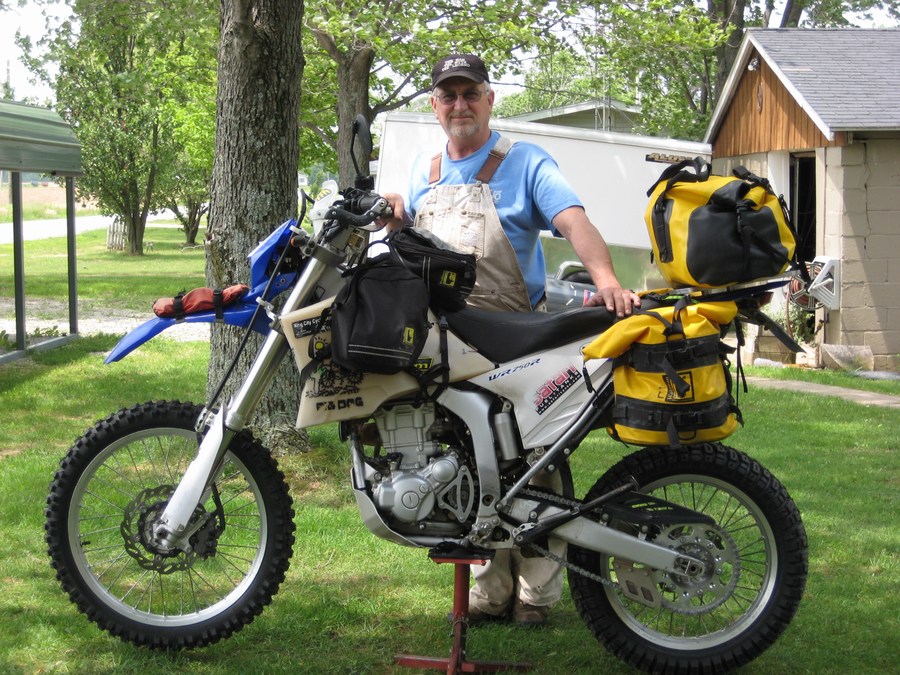
2008 Yamaha WR250R
Trip To Alaska in the books
This Page Last Updated 1-12-18
54,779 miles on my WR now.
Scroll to the bottom to see the latest stuff.
On this page--you find all the mods I've
done to my bike----I'll be updating things as I own the bike.
And down at the bottom of the page you may find some updated info and maintenance
I've done.
After owning the bike for a couple years now---and other
than getting my fuel pump replaced
under warranty for free--that has been the only wart I've found on the bike,
and that was done after
about 15,000 miles.
I've did several very big rides on it----the longest being
a 7,000 mile ride from the border of the US/Canada
all they way to Prudhoe Bay (Deadhorse) Alaska. So my bike has taken me from
the Mexico border all the way to Deadhorse
Alaska-------and back.
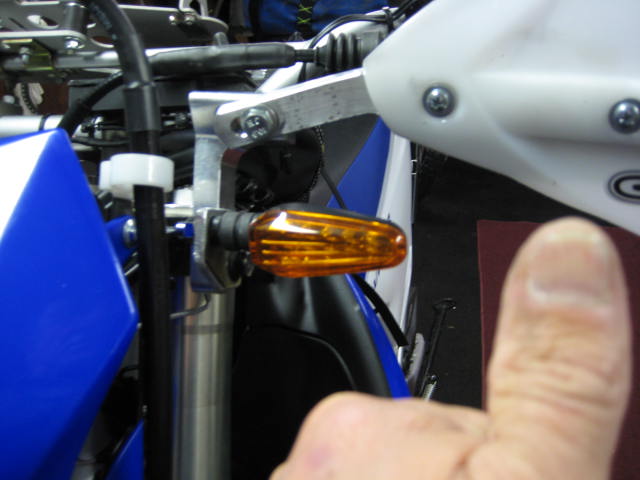
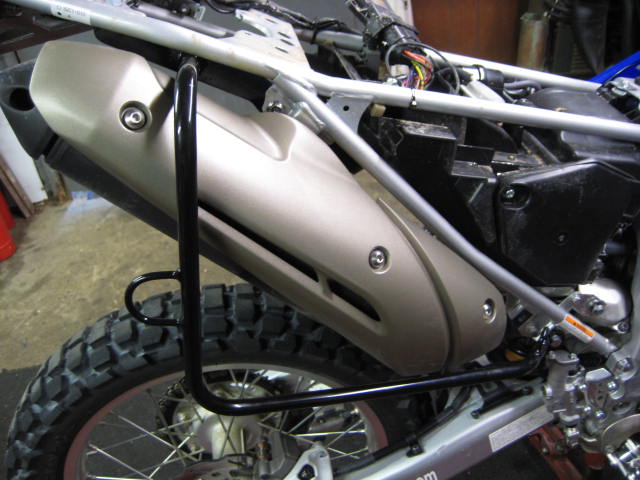
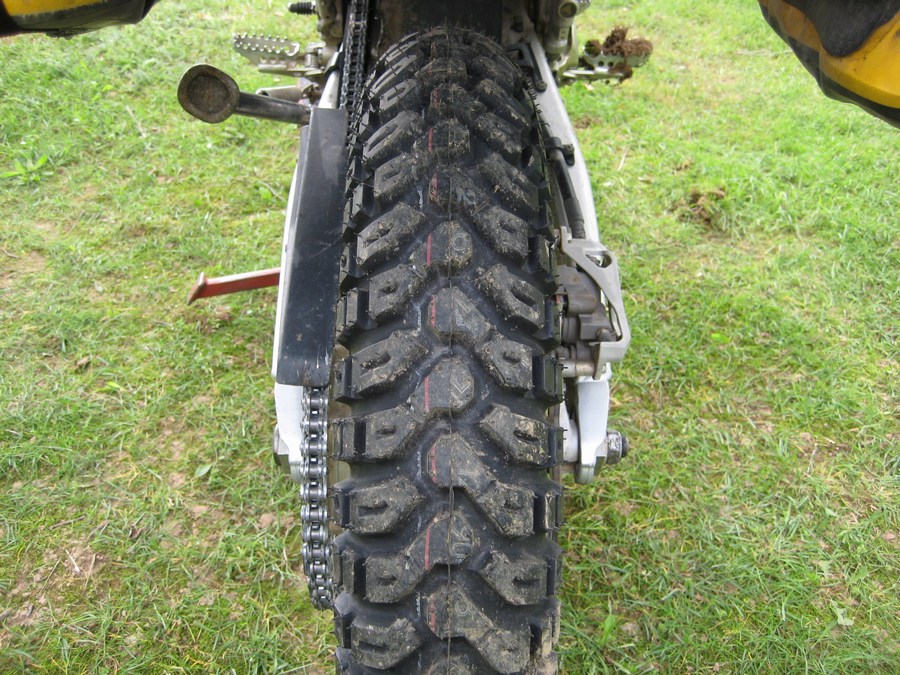
The only otherthing I've noticed to watch for if you don't
know how to adjust the chain correctly.
I don't follow the owners manual anymore for adjusting the chain--I leave
it quite a bit looser.
If you adjust the chain to tight----it will cut into your swingarm--I know
one guy that it cut into the swingarm
needle bearings and he had to have it re-welded. It was either that or buy
another swingarm.
The swingarm pivot point is lower than the Countershaft on this bike--not
so with most bikes.
Just a little thing to watch out for. He said the previous owner had the chain
too tight and when the suspension bottomed
it would pull the chain right into the bottom of the swingarm.
Check you rubber guide around the swingarm carefully and
keep an eye on them.
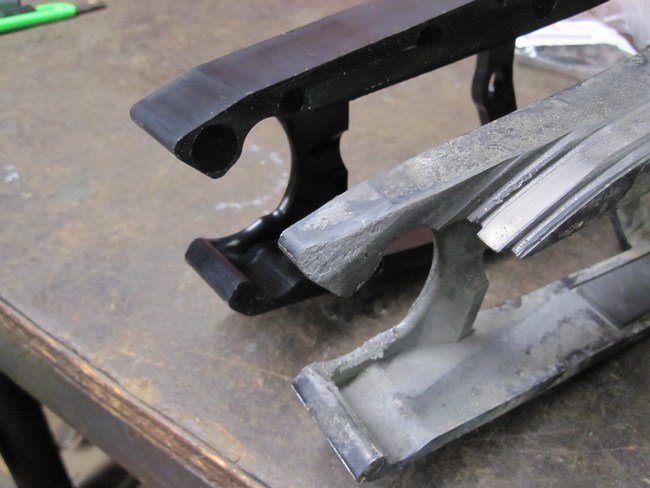
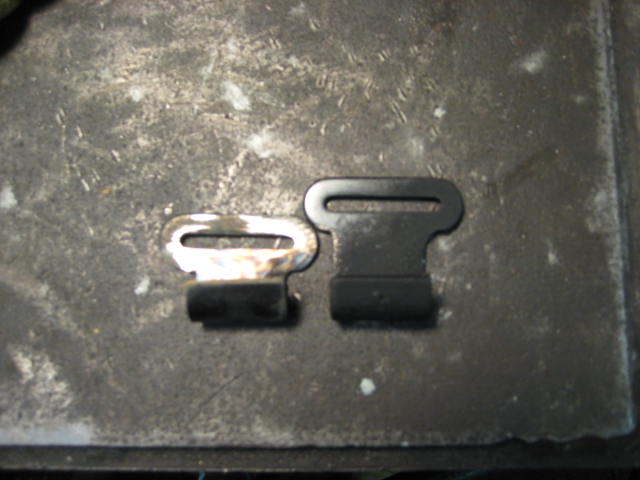
New one on the left--my old one on the right---they are upside down in the
picture. If your's don't look like
like the one on the left---you are awaiting disaster. If you are checking
you guide for wear and the bottom of the guide doesn't
come all the way to the front of the swingarm----it is worn out and you may
be digging into your swingarm---probably are.
I've been running my chain looser than the manual says and so far the chain
is not wearing on my guide at all.
If you've put on a 12 tooth countershaft sprocket ????
GET IT OFF !!!!
This will only aggravated this "potential" problem----you'll be
better off to work with the back sprocket for gearing changes.
Also---I will never put even a stock 13 tooth on my bike from now on---I've
got a 14 on it and will adjust my
gearing to suit with different size rear sprockets.
Also----the riding I'm doing with my WR is very different from 95% of the
people that have these bikes.
My mods---or lack of them probably won't suit you at all.
Most of the mods others are doing are downgrades for my riding purpose.
Especially engine and exhaust mods.
Guides are upside down in this picture--they wear on the bottom--not the top.
This is a new bike for Yamaha----and an
extremely unusual one---I think anyway.
The huge difference in this bike from others of similar purpose is that it
is fuel injected.
It is built street legal from the factory. There were a few things that attracted
this bike to me.
First being it is so much lighter than
anything I have, second is it's extremely wide 6 speed transmission,
third was it's unbelievably powerful 350 watt alternator, fourth was it's
very long term reliablity and
service intervals---first valve check is 26,000 miles--oil
changes are 3,000 miles. This is not a re-done WR250F motor at all.
First look you would think so--but this engine is so different.
This bike runs 65-70mph with ease--hard to believe but it does--and it's not wound out at all.
A big downfall to owning a fuel injected
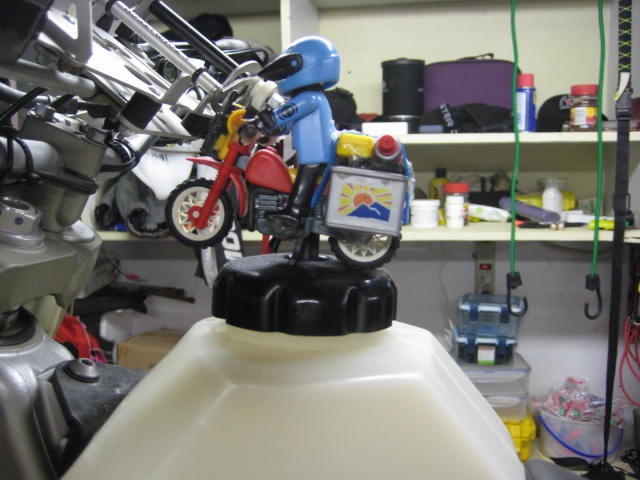
bike is the gas tanks are too small for me--as this one
is only 2 gallons------BigDog no likey !!!!! A 3.5 gallon "Safari"
tank is made by Aqualine in
Australia----when I found this was available I pulled the trigger
and bought the bike---I would have never bought it if it wasn't for a bigger
tank being available, as
no matter how good the bike is---I had to have more range. This will give
me a minimum range of 240 miles.
70 and even 75 mpg has been coaxed out of these bikes.
I did not want to carry gas anywhere except in the gas tank.
Auzilliary tanks take up to much packing space--is somewhat unsafe--and puts
the gas weight where I don't want it.
For me----there will be no need for aftermarket
exhaust, or fuel programming changes,
or brake and suspension mods. The seat is much wider and more comfy than many
bikes---such as
any XR, XR650R, XR650L Suzuki DRZ400, or any Husqvarna TE model------so, it
will be fine.
The suspension is already fully adjustable and is much better than I am a
rider.
Well here it is--before I started screwing
with it---put all kinds of crap on it---got it
dirty and just ran the dog crap out of it.

Here it is done after all the mods you can read about below.
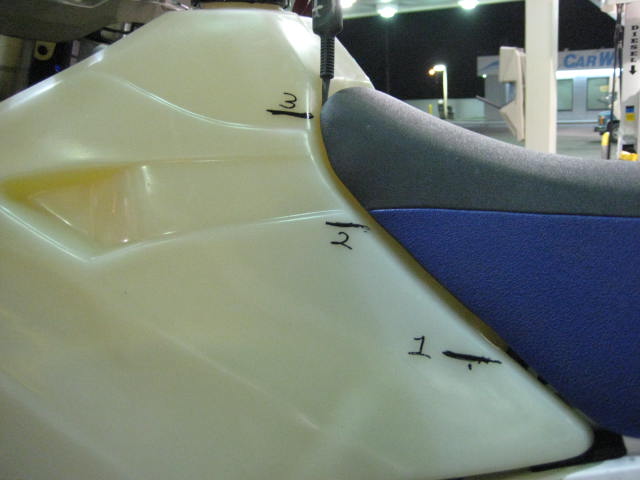
Bottom line on the gas tank---3.7 gallons--I ran it 101 miles after the low
level light came out till it ran out.
It started sputtering at 227 miles and I shut if off and poured some gas I
was carrying in it.
So it will go easy over 200 miles. This was with the innacurate stock speedometer.
Most people I read about are using this as a street legal dirt bike----it
is a superb bike for this.
My mods lean toward long distance multi--week adventure rides across the country.
My mods probably don't suit you weekend dirt bikers----I did that for 30 years
and have moved over to adventure riding now.
I'll chronicle by list of mods that I am doing to this
bike.
Most of these mods are the same ones I've done to every dual sport bike I've
ever owned.
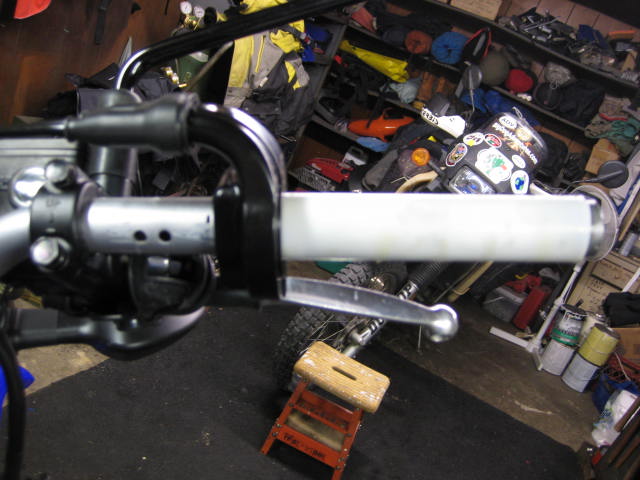
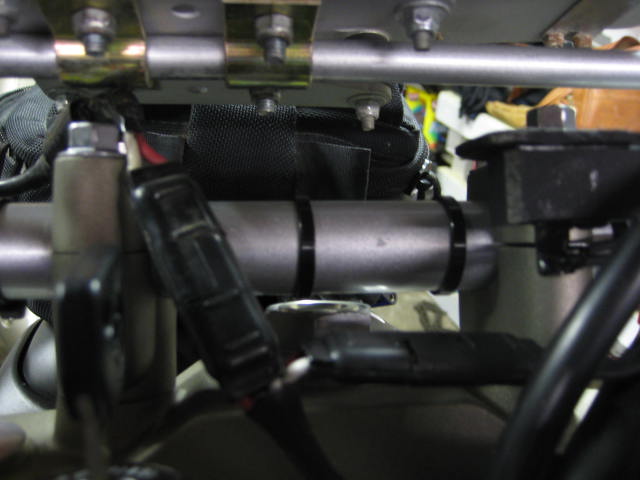
First mod was the addition of "Hot Grip" brand of heated grips.
These come with a low and high switch
and are very fat---I like the bigger diameter as they are just easier to hold
on to and cut down
on hand fatique. These are model #475-875 which are 4 3/4" in length--be
sure and order their epoxy to
glue them on as ordinary quick set epoxy won't hold up.
About $130 and available Here

I cut the old grip off and cut out the white plastic end
of the throttle tube as I will be adding handguards
in the very close future.I had to move my controls in about 1/2" so the
heated grips don't overhang the handlebars.
Listen up
I've been there and done this---and consulted
heated grip manufacturers---if you put heated grips (any brand) on fat
aluminum bars------the aluminum will soak up your wanted heat quite a bit.
I have them on my 950 which has fat bars and I don't like it.
They just won't get as hot as with cheap stock steel bars.
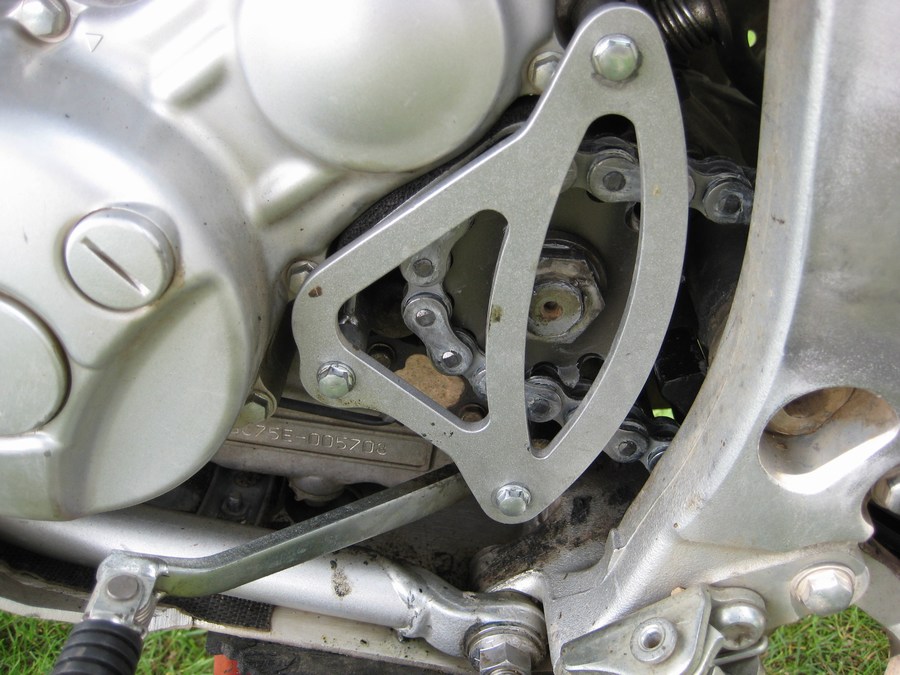
This is an aluminum plate I fabricated and mounted the
heated grip switch and resistor to.
I will mount this plate to one of the handlebar clamp bolts--nice and handy.
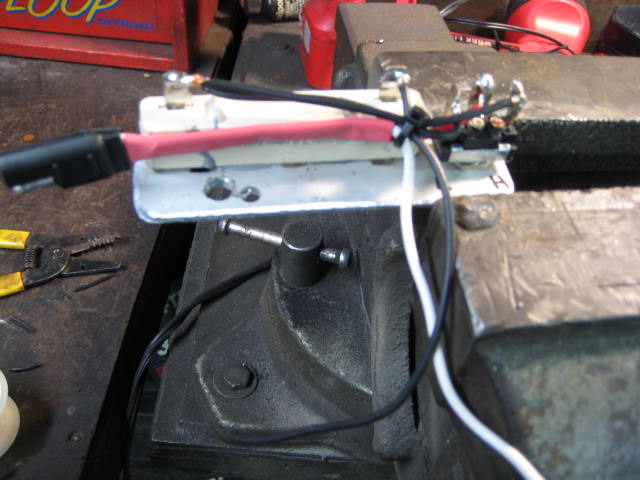
I tapped into the gray (I think) wire that feeds the high
and low beam switch on the handlebars.
Do not tie into a wire at your headlight--this will throw an
additional load on your high low beam switch--and also your grips will only
work on high or low beam---whichever
you tied it into. After my tie in I ran wires up behind the speedo to the
handlebars and put on
ordinary 2-prong trailer plugs. I will plug my heated grips into one and my
gps into the other.
The light circuit I tied into is 15 amps--and after running the headlight
there is plenty of power left to run my heated grips and gps. I have about
7 amps leftover.
Here you can see the 2 SAE 2-prong trailer plugs that I brought up to power
the grips and gps.
The cool thing about this circuit is---it is only hot "AFTER"
you start the engine.
The headlight on this bike only comes on after the bike is running----pretty
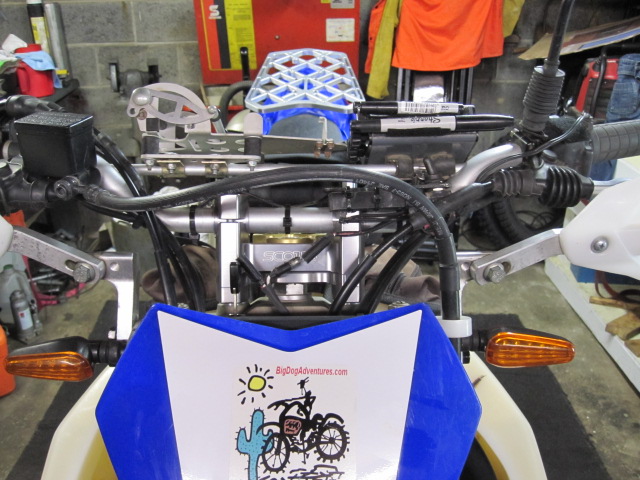
cool !!!!
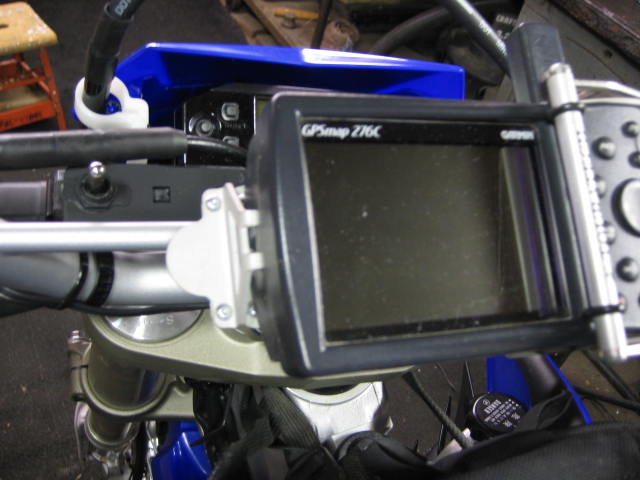
Here you can see my gps---a Garmin 276C on a touratech
mount.
To the left of the GPS you can see my heated grip switch.
3 position---off, low and high. I put a rubber boot over it later on to keep
water out.
A Garmin 276C will run your battery dead in a day or two because of the re-chargeable
battery in it---this was not
a problem for me as I wired into a circuit that was only hot when the engine
is running. Perfect.
When the key is off--no power can go to my heated grips or gps---this was
so simple to wire it up
this way and there was nothing to buy.
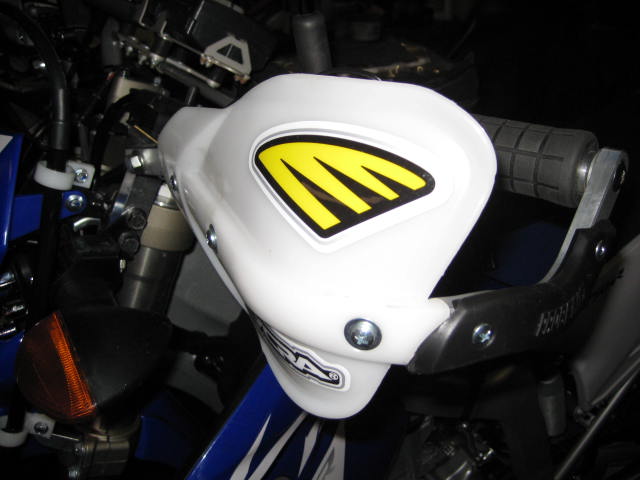
Side view--the hot grips are installed and all wired up--but
the handguards are not on yet.
I ordered my heated grips with open ends to facilitate the handguard installation.
These mirrors may have to go---I may put on some that can be folded down and
are more moveable--I don't
want the clutch perch to bust in a crash--after all she's been on the ground
everytime I've rode it !!!!
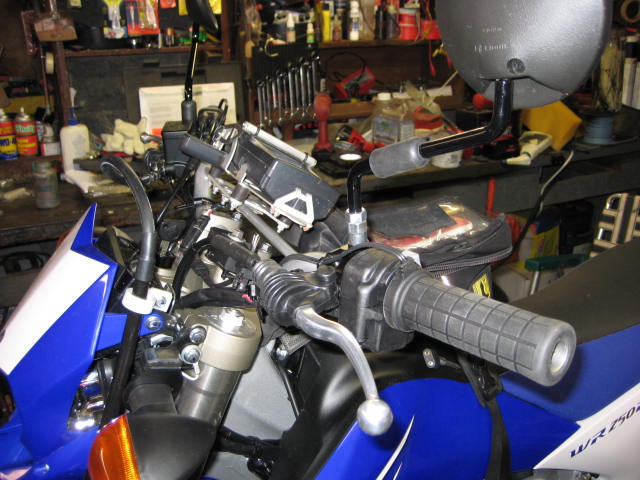
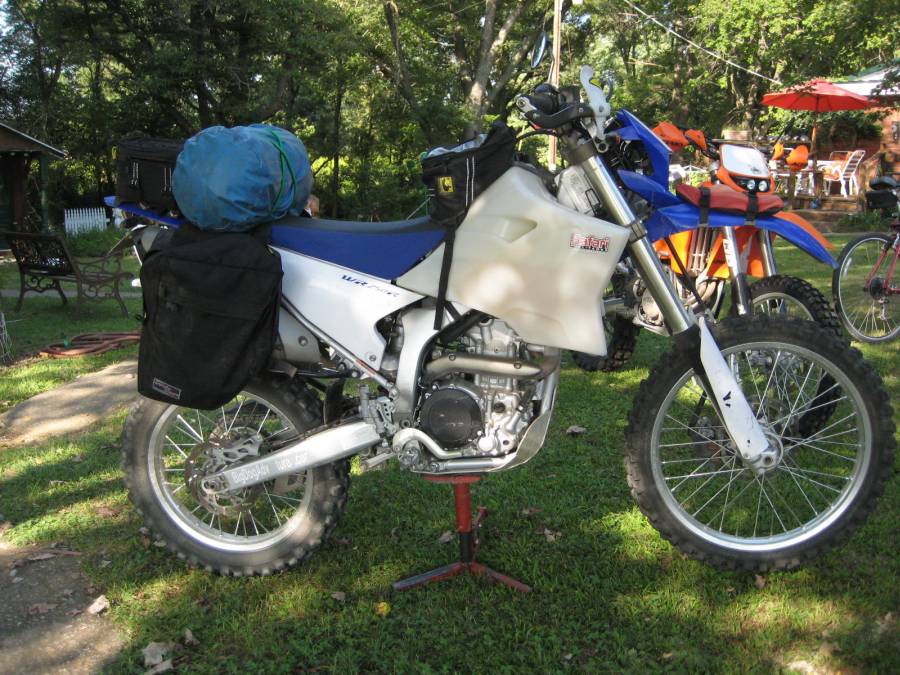
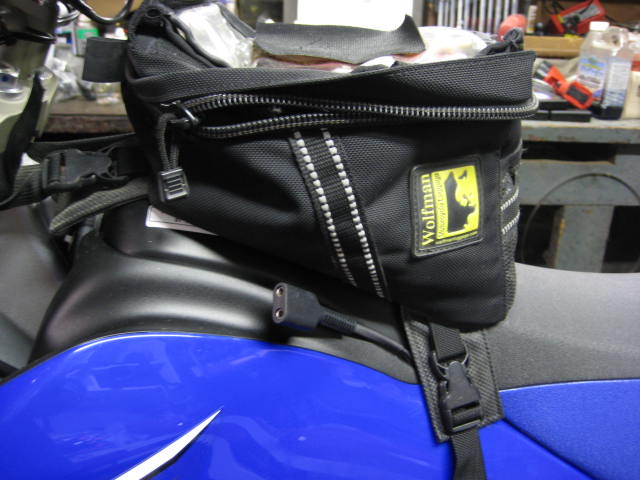
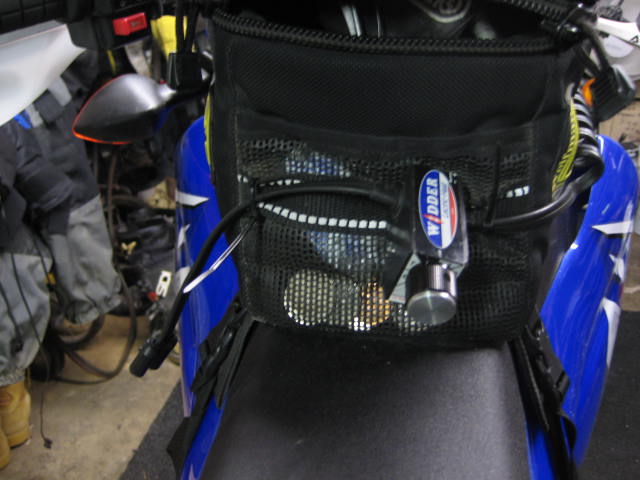
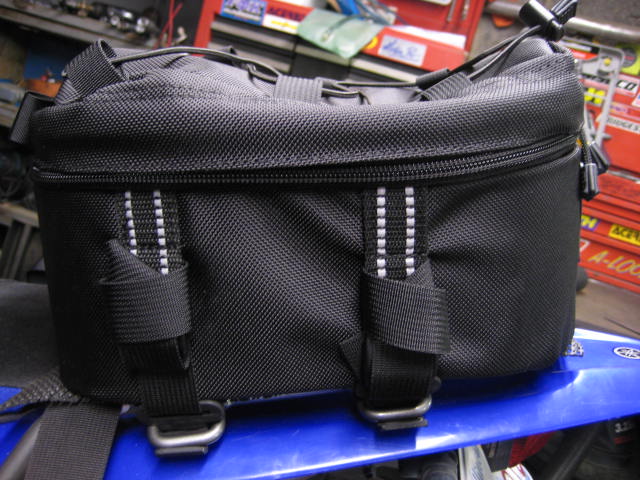
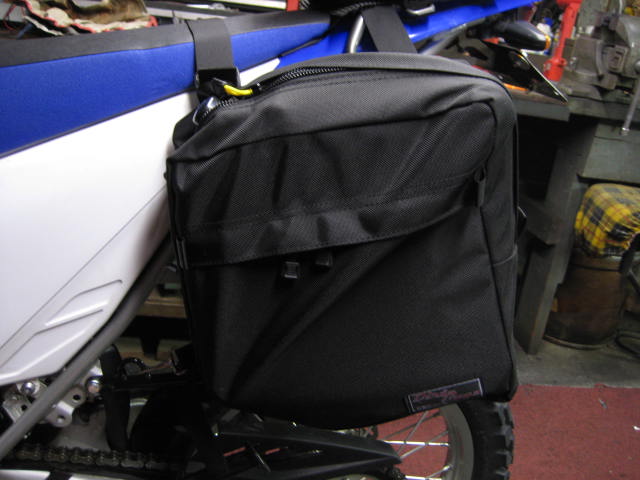
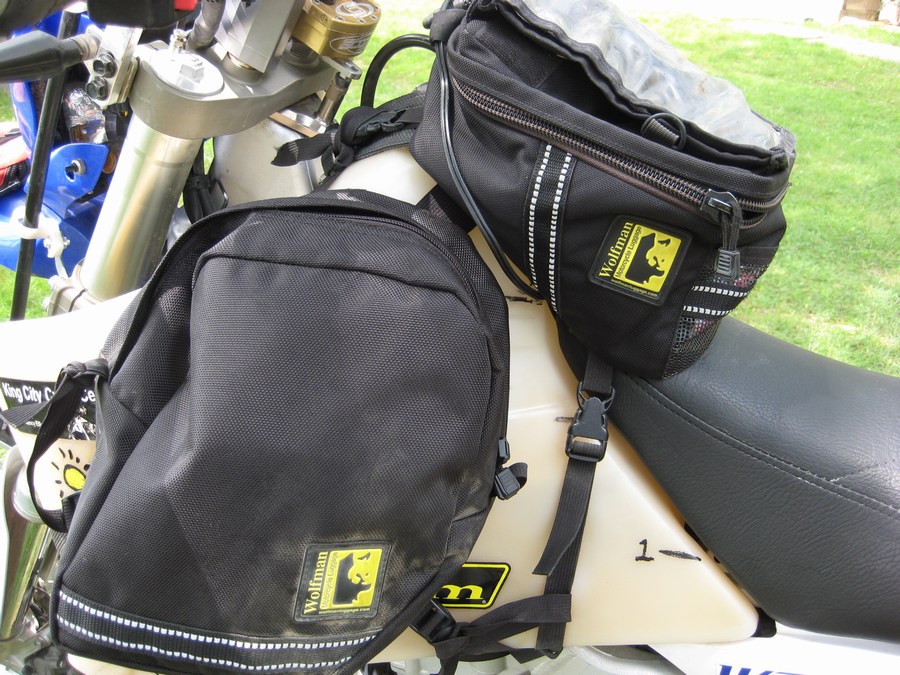
Here's a good shot of both my Wolfman "Enduro"
tank bag and the plug (Widder brand) for my heated clothing.
I use this bag on all 4 of my bikes.
This tank bag is available Here
For about $80.
And this one comes with a rain cover.
This is definitely a "BigDog" custom mod.
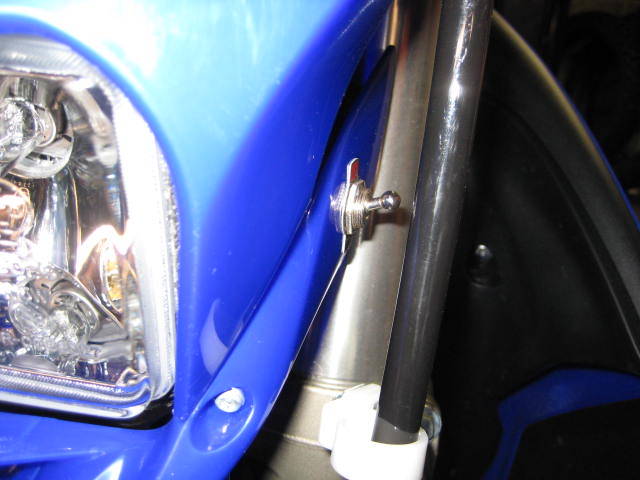
I wired this switch into the low beam headlight wire "only" so I
can turn off my headlight---why you ask ????
To be incognito sometimes !!!! And, to reduce power consumption if need be.
And if johnny law pops up real sudden---I can just hit
the high beam and show him I do have lights.
This particular switch didn't last very long at all (water got to it)---I
replaced it with a waterproof switch which is available
from the same place I got my hotgrips-----not cheap-------$15 a wack--but
nice smaller switch requiring only a 1/4" hole.
To the left is the growing pile of stuff I've determined
I just didn't need----and to lose weight.
However I'm probably going to add more weight than I take off !!
Why don't I just go on a diet ????
The Cycra Pro-Bend bars are to the right.
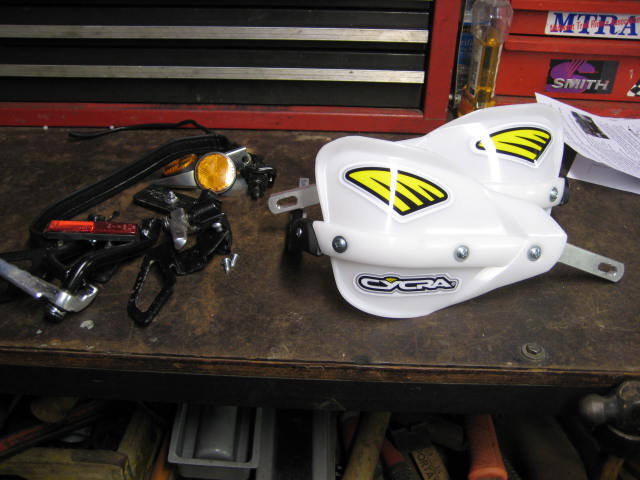
I had this brand new set of Cycra Pro-Bends laying around
as I tried to put them on my KLR--that was
a no go with the KLR fairing. I ordered triple tree front mounts for the KLR
but had to re-order triple tree
side mounts for the WR. I won't mount handguards to the handlebars---to difficult
and usually the handlebars
are way to cluttered anyway. I had to bend these aluminum handguards a little
to get them to line up.
This is not an easy thing to do because they are so thick. I heat them up
a little--not to hot as aluminum
can go molten in the blink of an eye---and hit them with a rubber hammer while
they were mounted
firmly in a vise----no problem-o
Thats "no problem" for you gringo's !!!!!
These can be bought HERE
Lots of options for colors and mounts---be sure you order what you want.
About $130
Here is a close-up of the triple tree side mounts that Cycra sells.
I ran the stock tires on my first 2,500 mile trip--they
did fine but aren't very aggressive of course.
I was able to do very good in some mud because the bike is so lite--my buddy
on a heavier bike had to turn around.
The trailwings on the bike are not what I will run while I own the bike. I
could care less if a tire is DOT approved
or not----but I need a rear tire that will last at least 3,000 miles---that
forces a rider to select a DOT tire.
The tire on the right will go on the rear and is a DOT approved Dunlop 120/90
18" 606.
I never used the Dunlop 756 in the picture--I use a 606 on the front.
I even ran a Kenda K270 450/18 on the rear
for a very long ride that I expected to be about 5,000 miles. It worked very
well---I'll probably keep one on hand.
Well JoJo my dog---let out a screeching howl---letting
me know the UPS truck was here. Good Boy JoJo.
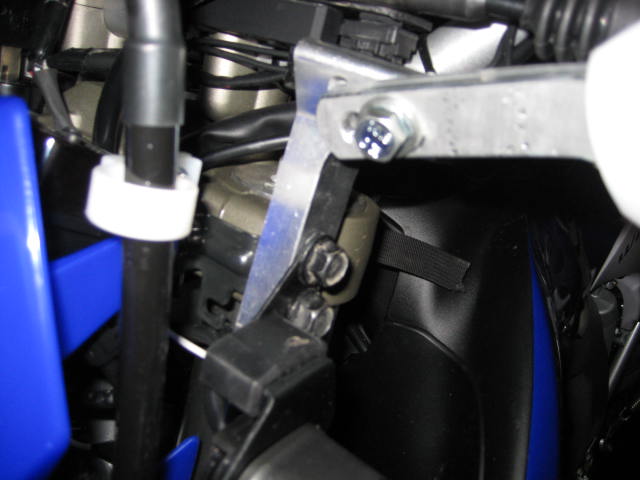
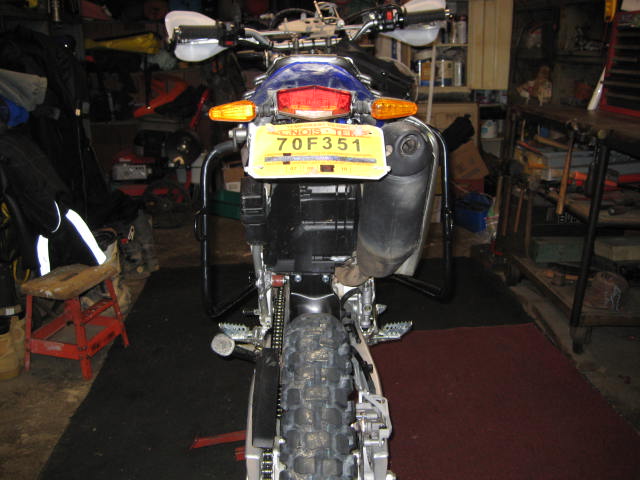
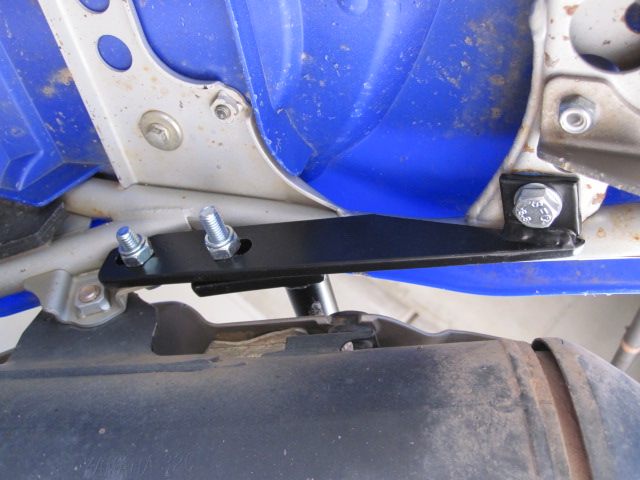
Ricochet Skidplate from Utah Sport cycles and tailight--turn signal replacement
kit.
I kid you not-----I slit open the plastic bag the skidplate
was in and got a 10mm socket out
and 1 minute later this baby was mounted on the bike. No screwy clamps---bolted
right in to existing
mounting points on the bike. How cool is that.

This skidplate is available Here
For about $90
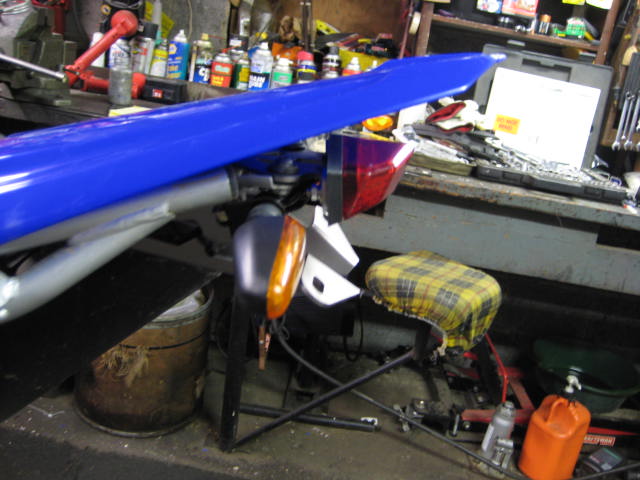
OK----all this has got to go-----it'd be great on my KLR--but not on this light thing.
First thing I had to do was take the seat, sidecovers and
rear fender.
I thought oh no---this will take a while----2 minutes later it was all on
the ground
So far this thing is so easy to work on.
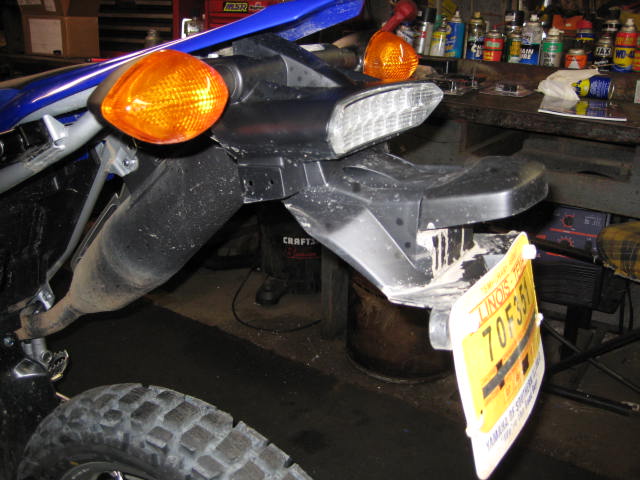
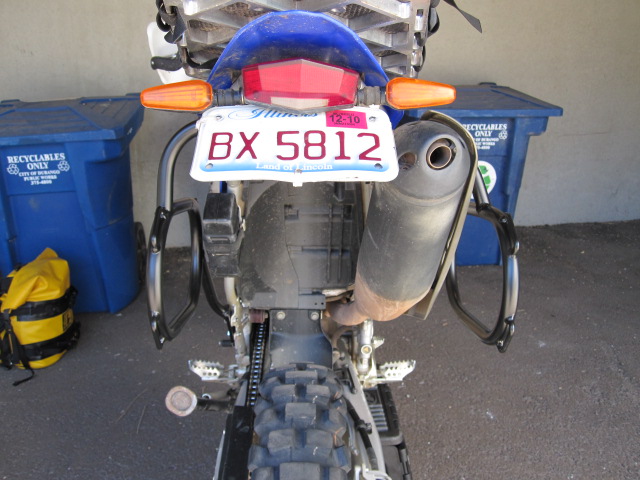
And this is what I replaced the stock turn signals, tailight,
brake light and license plate light with.
Everything is LED. From DRC I do believe.

I spiced the wires in hear using soldered connections and
heat shrink tube.
No crimp connections or black tape on BigDogs bikes.
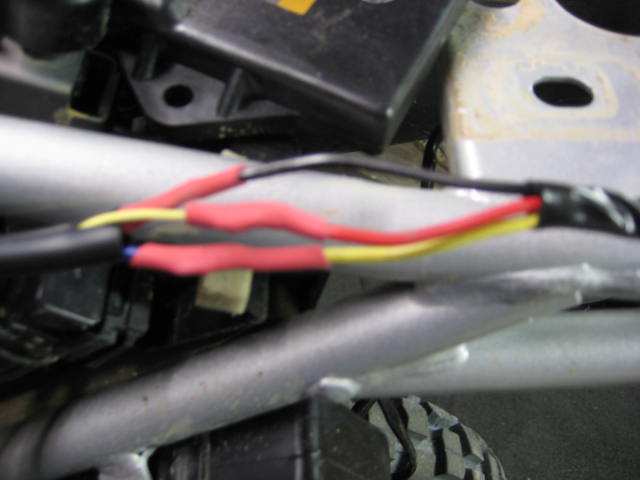
The wiring splice is done.
Finished product---and it worked !!!!
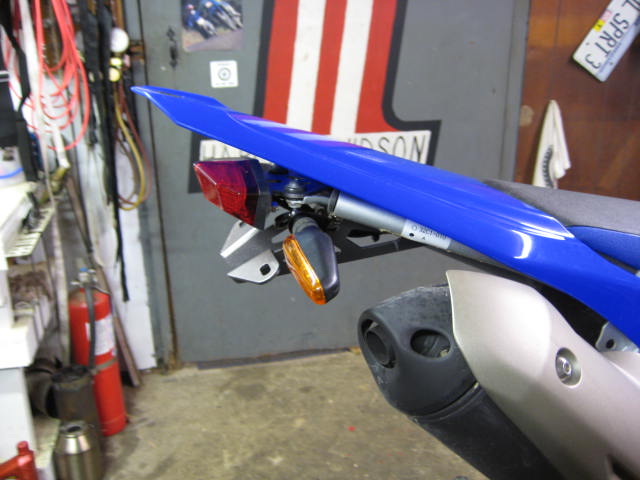
The LED light kits I bought for this bike are available
Here
About $130 buck for the tailight assembly and all 4 blinkers.
Yes it does throw a little muck on my tailbag now--not bad tho.
Here is where I routed my Widder heated clothing thermostat to----really handy.
Front turn signal---this has got to go.
Be nice on my KLR or a big Beemer--not on this bike tho.
Thumbs Down
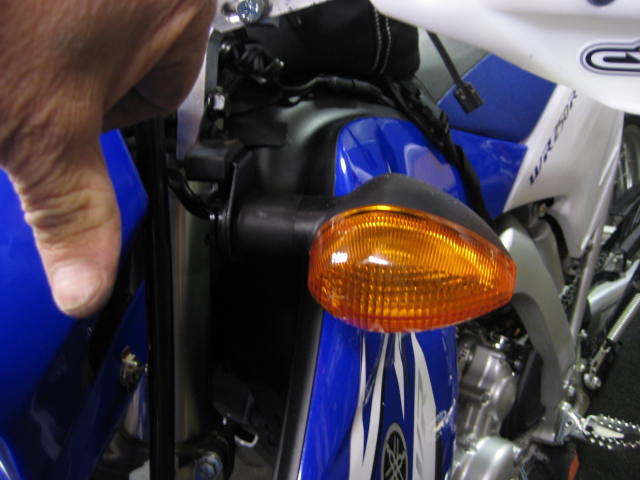
Thumbs Up
Led Turn signal is so much smaller and pretty much out of harms way for getting
broke.
I bought a special realy to work with LED's as they now flash faster with
the stock relay.
But---as for now I'm not installing it, as I kind of like the way they work.
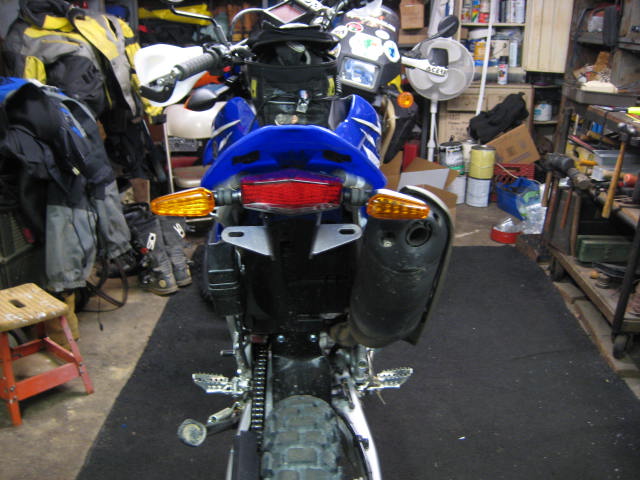
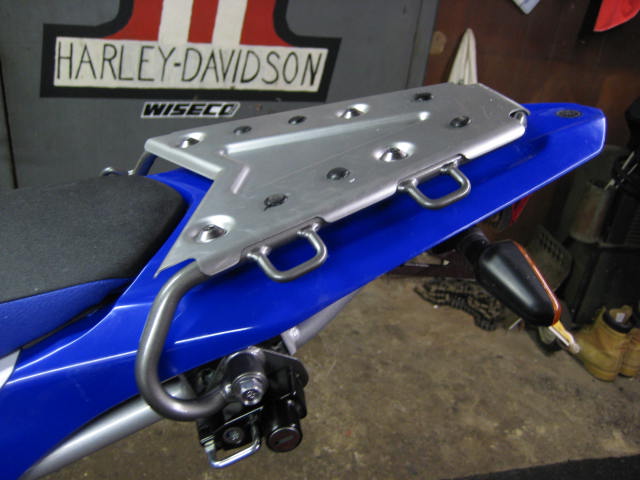
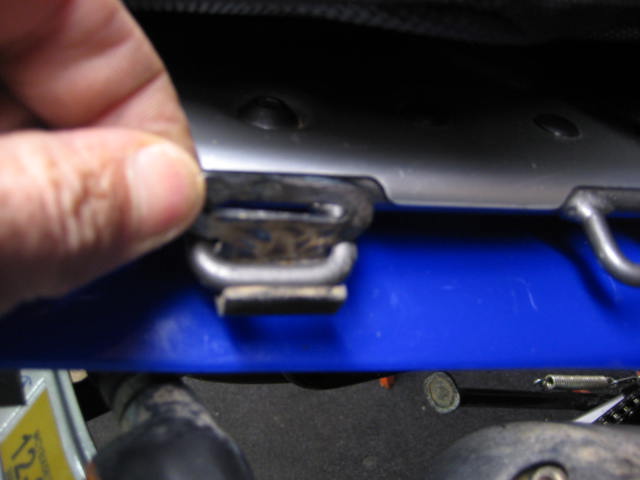
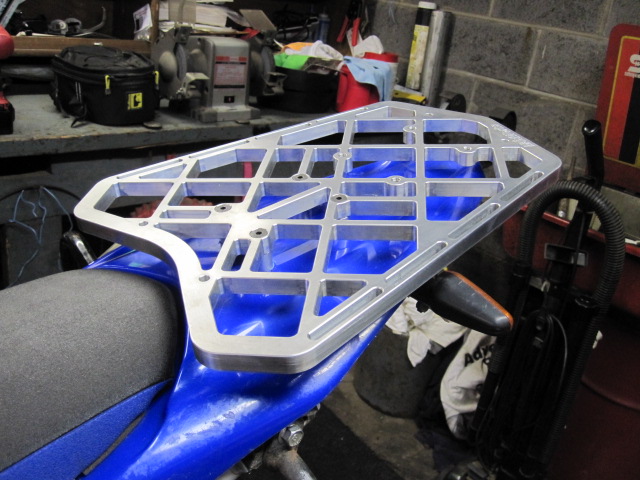
I really like this rack---it's the OEM one from Yamaha--about
$140.
Not to big and has really nice and handy tie down points and I was
able to keep the OEM helmet lock.
Wolfman makes a really nice tailbag that is shaped just
like this rack.
I think I have to have one. It's available HERE
About $110
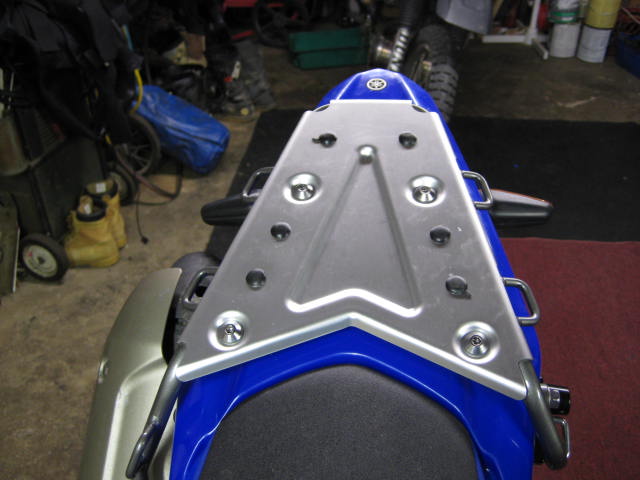
The frame on the Yamaha is part aluminum and part steel.
The main frame is aluminum but thankfully the subframe
is steel----it will hold up much better than aluminum.This thing is perfect
for this bike--Yamaha really done
an exceptional job with this thing. In this picture it looks like the rack
is not supported in the back---it is tho.
Didn't know BigDog used to ride a Harley did you---yep---wife painted that
on my shop door in 1975.
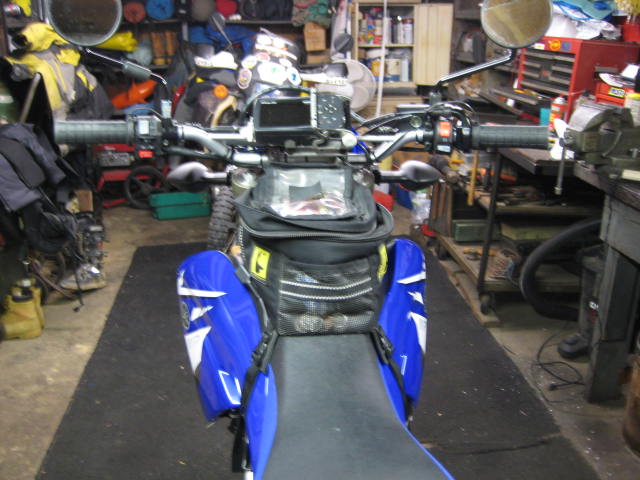
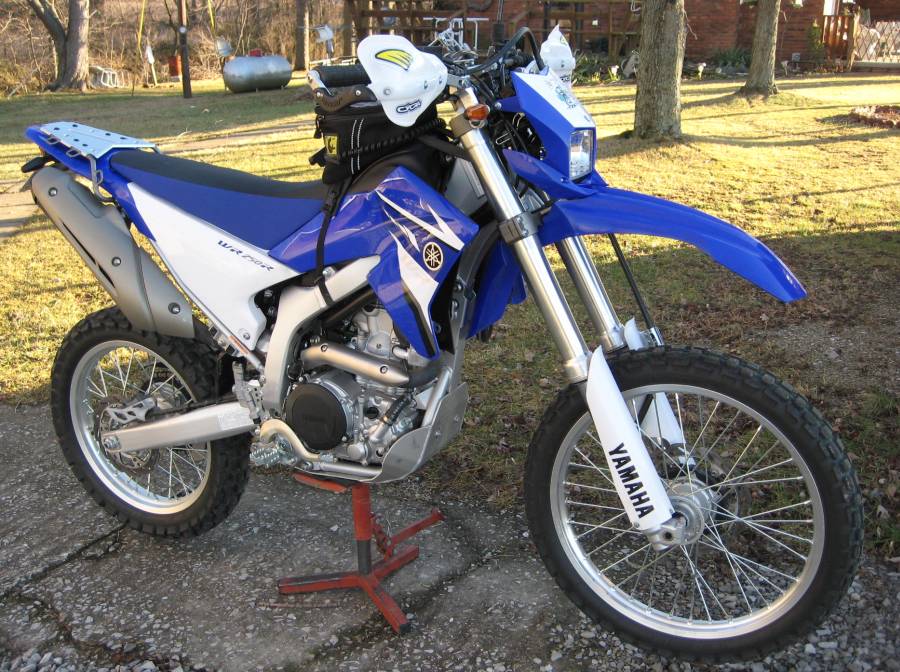
Bike with most mods done--I really like this bike a whole
lot better than my Husqvarna TE610.
I had no intention of selling my 610 when I bought this bike. After about
200 miles I knew I'd never ride the
Husky again---people riding 650cc bikes may never agree with me--or even give
a bike like this
and 2nd look---but I'm telling you this bike is that good.
Anything even resembling technical or rough terrain the Yamaha breezes thru
it so much easier and faster than
the Husky. Yes faster--much faster. And 70mph is so easy--seems more relaxed
than the Husky----can't
believe I'm saying that. I fully intend to do the same kind of long distance
offroad adventure travel on this bike
that I did on my Husky---it will be easier and a hell of a lot more fun.
I may do a lot of things to this bike---but I won't do one thing that makes
it even the tiniest bit louder.
I've been around a long time---I've seen upfront and personal what noise has
done to our sport.
Nobody may ever tell you that your bike annoys them---that doesn't mean it
doesn't.
So many people are doing it they come to think it's OK----same with the "F"
word---people throw that
word around like it's OK-------it's "not".
My dog was barking like crazy---thought he was going thru
the front door---UPS was Here !!!!
Good Boy JoJo !!!!!
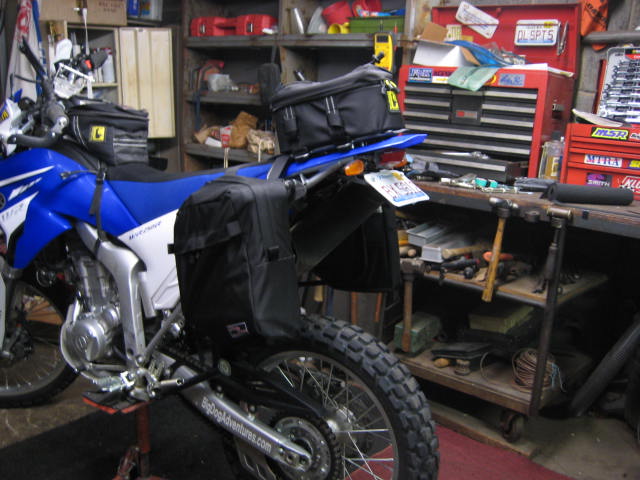
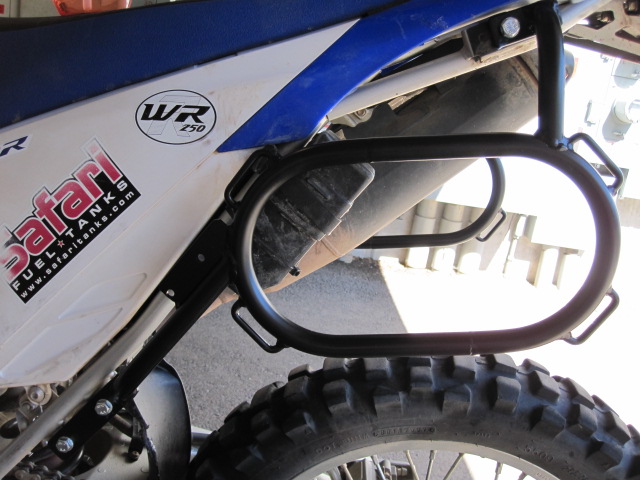
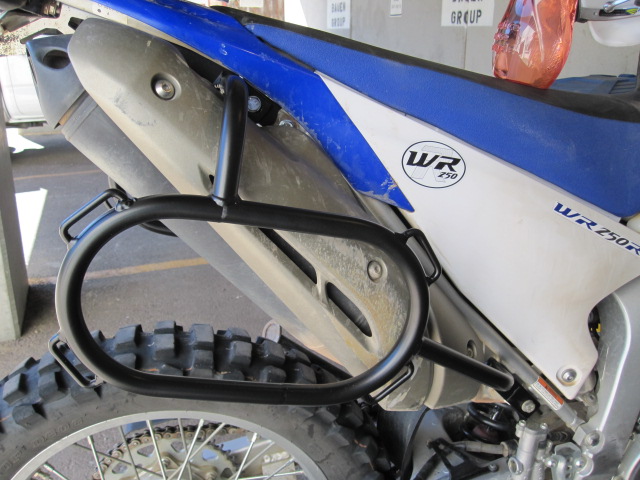
I had ordered some dirt Bagz and racks for this bike---really
nice that the aftermarket is making stuff for this bike.
I had let my old bags go with the Husky 610 so bought new ones---one set of
racks but both sizes of bags
so I could pack according to the trip demands. The "Scouts" are
the small ones and the "Rangers" are the bigger ones.
You have to remove the seat and fender to install or remove the right side
mount----I didn't like that at all.
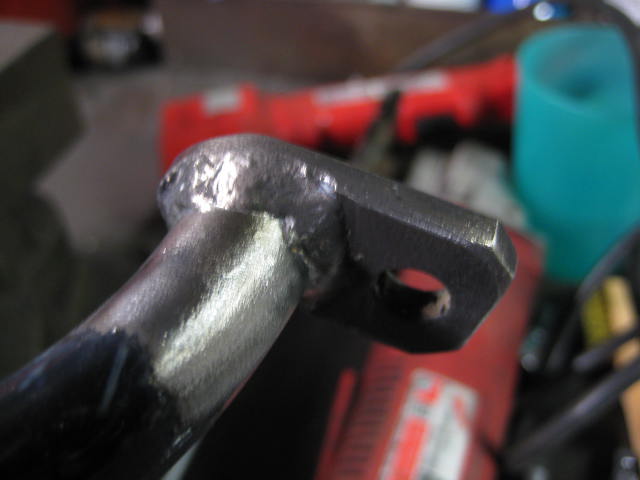
Why you ask ???? A bolt goes up thru the subframe and there
is a nut on the top that can only be accesed
by taking the fender off------so BigDog welded the nut to the subframe and
now I can remove and install this
bolt from under the subframe with no problem.
I made 2 small tacks on the nut to keep it in place.
Right bracket installaton is done, Now on to the left side.

The left side would be a quick no brainer to install if
you hadn't installed the Yamaha OEM rack.
You would just have to remove the footpegs and helmet lock and bolt it up
with 2 simple bolts.
With the rack on there.... the bag bracket hits the rack and it's impossible
to bolt it up.
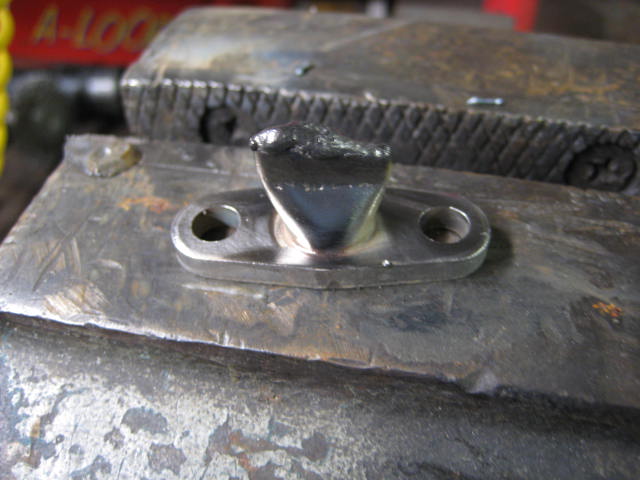
I cut about 1" of the tubing off and welded the tab back on in a position
that it would bolt to
the outside of the OEM rack-----genius.....I thought to myself !!!!!!
"I'm not totally without skills"
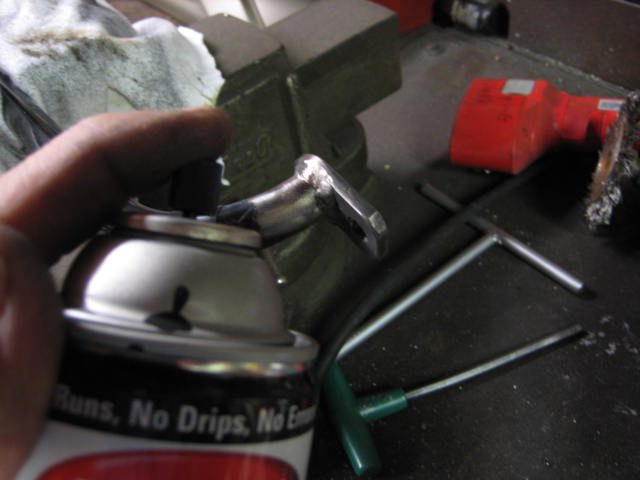
Here I am just tacking the tab in place in the proper position.
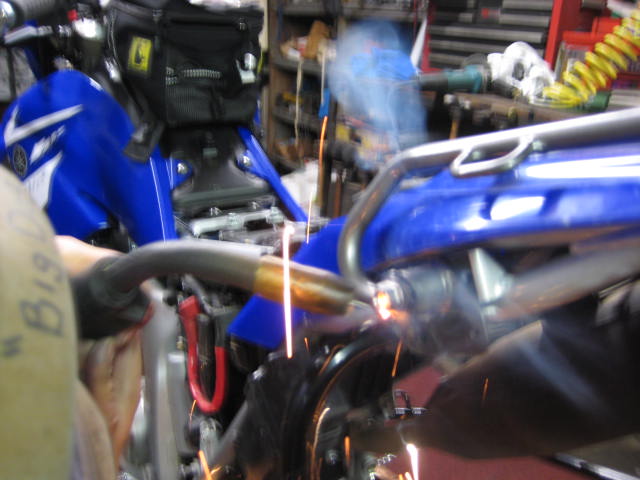
Then I remove the whole bag bracket and took it to the vise for final welding.
Then it was off to my hermetically sealed dust-proof paint booth.
Finshed----eat your heart out !!!
The rear of the rack is now about 1" lower than it was designed ....but
this is not noticeable at all
and caused no problem. You cannot mount or use the helmet lock now.
These racks are not design to hold "ANY" weight---the straps over
the seat take the weight of
what's in the saddlebags---these racks just merely hold the bags off the bike
and exhaust.
They may seem spindly to you-----but do the job and do it well--they are all
they need to be.
Here is the bracket all mounted up.
It would take about 3-5 minutes to put the mounts on or
off now---without removing
anything. The right side mount is a little more fiddly as it has 2 mounting
tabs
on the rear of it.
These racks and bags are available Here
The small bags with racks are $205 and with the big bags they are $248.

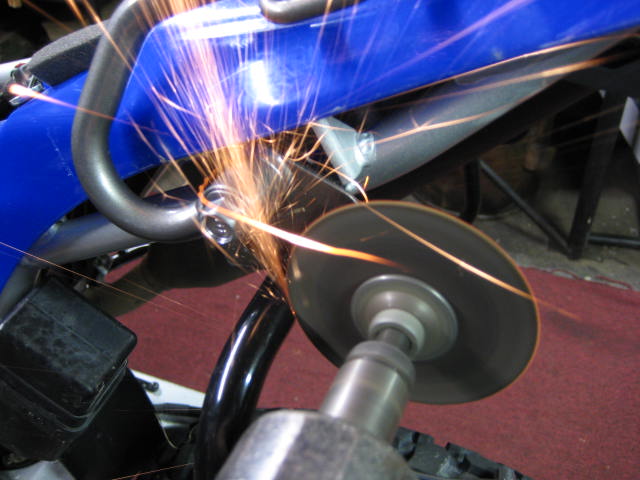
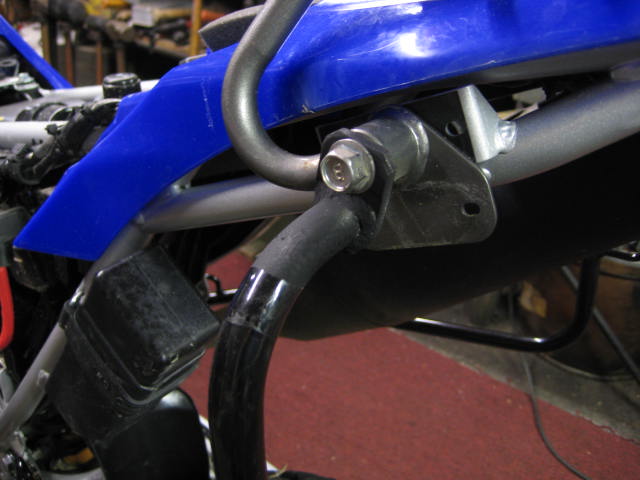
This thing was just weighing me down and slowing me down--AIS or something the other ???

After removing it you have to plug where it connects to
the airbox---I just used a rubber slip on cap
available at any automotive supply.
For capping off the connection to the exhaust port you have to put a plate
over the hole. I just used the
stock flanged--cut the steel tubing off---pinched it together with my vise
and use my wire welder again
to weld it shut and bolted it back on. Don't lose the gasket--mine fell into
the skidplate and I couldn't find it
for a while.
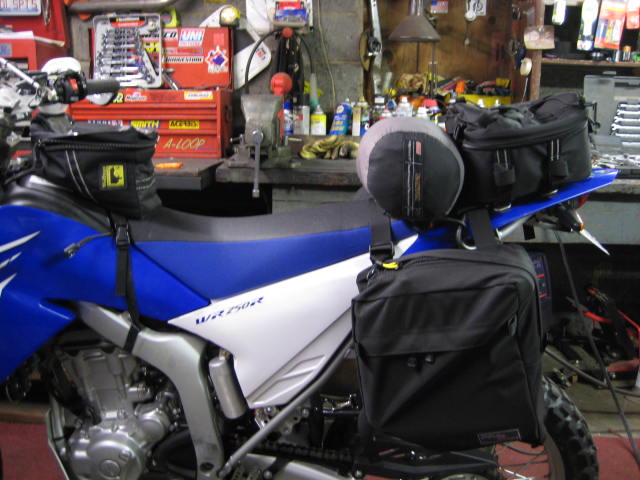
I just received my Wolfman Peak Tailbag which I have hope
would fit this rack.
I'm beyond words----it seems it was made for this bike----it wasn't designed
for this bike----but it is perfect--well almost.
Look at how the steel hooks that were made to hook under a seat just hook
in the OEM Yamaha rack !!!!!!
The bag is expandable but is shown here unexpanded. It has cinch straps inside
and a mesh zippered
storage pouch---it's nice--very well made. I have a lot of respect for wolfman
products.
An accessory rain cover is available for it.
$110 available Here
I had to turn the hooks out instead of in so they would
hook on my tailrack.
When I was done the bag just wouldn't pull tight enough to suit me so I shortened
the hooks about 1/4" each
Here you can see the original on the right and the one I shortened on the
left---My little wire welder
came thru for me again. It was off to my hermetically sealed, windproof, environmentally
friendly, ecological
sensitive paint booth for a little rattle can paint job !!!!!
Here is a cut and welded clip before painting and how it will fit in the tailrack loops.
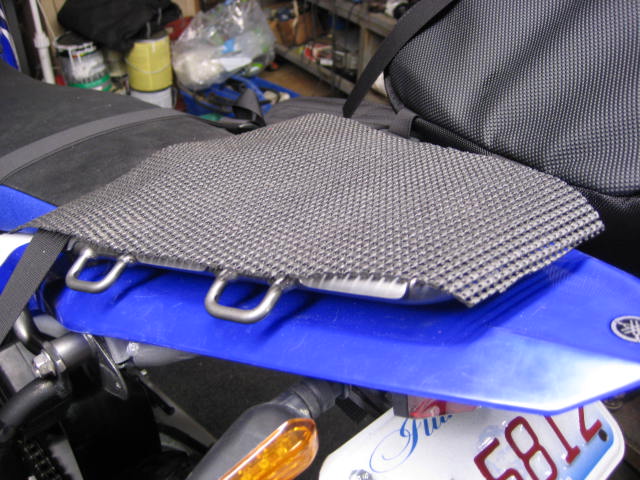
I put this non slip stuff which I guess is made for kitchen
shelves under any tailbags I have.
this makes it much less prone to slipping around and makes a much more stable
load.
I showed my dirtbagz mounts--but not with the bag on--these
are the smaller scout bags.
I bought the bigger ranger bags too--just in case. They'll fit on the same
rack.
This picture is very interesting----guess what's in the bag?????
Hint---I don't have my big gas tank yet !!!!!
A Kolpin 1 1/2 gallon ATV plastic gas container.
Now I can carry 3 1/2 gallons of fuel and have a range of about 240 miles.

OK---I can now go where I want to go--in the manner I want
to.
I don't like the gas in my dirt bagz--but it will have to do for now.
My small sleeping bag fits right in front of the tailbag---and
although it may look like it's in my way---it's not at all.
The left bag is full of gas--but I have the right saddle bag, tailbag and
tank bag to put stuff in.
I suppose some of you (maybe the younger crowd) or wondering
what the hell am I doing.
You can't race and roost around nasty single track in deep mud slamming into
trees and
just ripping thru the woods on this thing--you've got to much crap on it and
have it geared
way too high----what are you thinkin' BigDog ?????
You have to understand----I use to race for years---was
pretty good at it and won the last hare
scramble I raced-----I'm 58 years old--I am no longer interested in that.
Going for a day ride in the local forest
just isn't what I built this bike for--I had fun racing and it made me a better
rider no doubt--but
adventure touring is what trips my trigger now.
Meanwhile my dog JoJo is on point waiting for the UPS truck----I
need more-----stuff !!!!!
Nothing gets by JoJo. If a mouse farts---he knows it.
He has 2 points of surveylance
Good Boy JoJo

Rear shot of the mounts.
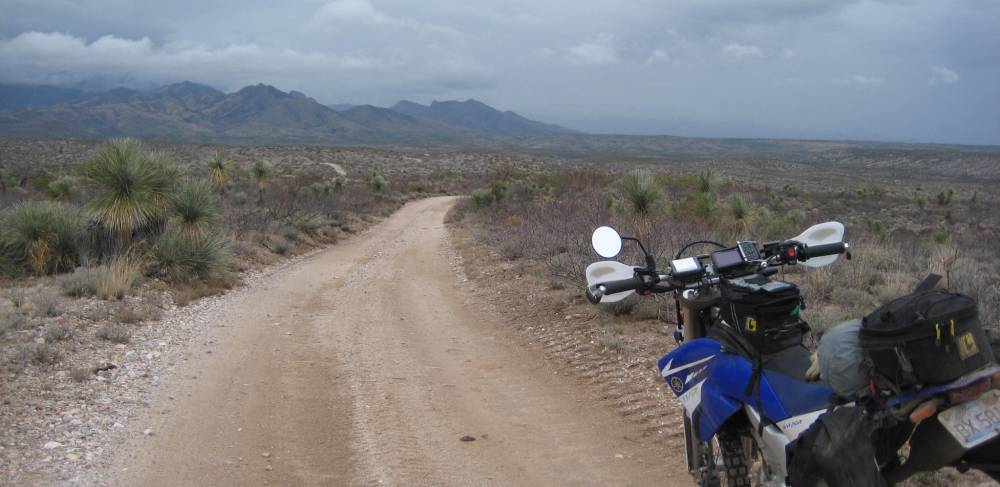
In January 2009 I rode this bike on a 1,700 mile unsupported
ride in New Mexico and Arizona.
The bike was flawless and did whatever I asked of it. It had about 2,350 miles
on it after this trip.
Here it is in the Arizona desert.
This nice lady is bringing me more stuff.
Yes she has my new gas tank !!!
I love this woman who brings me stuff.
I don't know why JoJo doesn't like the UPS person---I mean.....what's
not to like ????
He always lets me know when he sees the big brown truck !!!
Good boy------JoJo !!! Let's get a treat !!!!

Ok the UPS lady finally showed up with my 4 gallon clear
Aqualine Gas Tank that I've had
ordered for 8 months---this is the final mod I want to do to the bike. I've
research a lot of mods for this bike.....
some I liked---some I didn't---I have it built for what I want out of the
bike.
I'd been gone awhile and my wife had all my stuff piled up in my shop---I
had also ordered new
tires for my KLR--some parts for it---and a Zero degree big agnes sleeping
bag (for my
planned Alaska trip on the KLR.
I ordered a clear (natural if you like) tank so I could
see my gas and know exactly how much I have.
I see guys fussing on the net as to what color tank to get ??---I could care
less, as I am only concerned about function.
I can see how much gas I have or don't have with the clear tank and it protects
my radiator.
A lot of guys are carrying gas in different ways to go long distance--I did
once cause I had too.
I'm not happy carrying gas elsewhere on the bike----it adds another eliment
of danger and also takes up
very valuable packing space on a bike where packing lite is essential.

I threw the tires into the pile---and proceeded to the
task at hand----
Getting the gas tank installed.

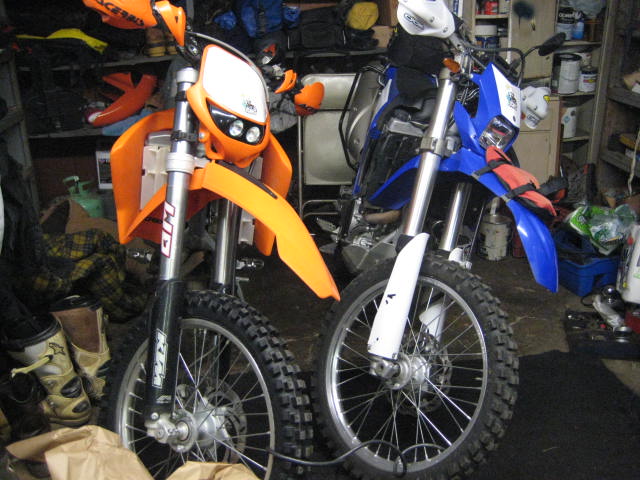
While I was gone I had my WR250R and KTM 570EXC chained
together.
I really don't think they like each other---but were forced to share the space
!!!
One thinks he is faster (he is)--the other knows the tortuoise will pass the
hare--eventually.
I'm not going into the exact install--it was easy and I
just followed the instuctions.
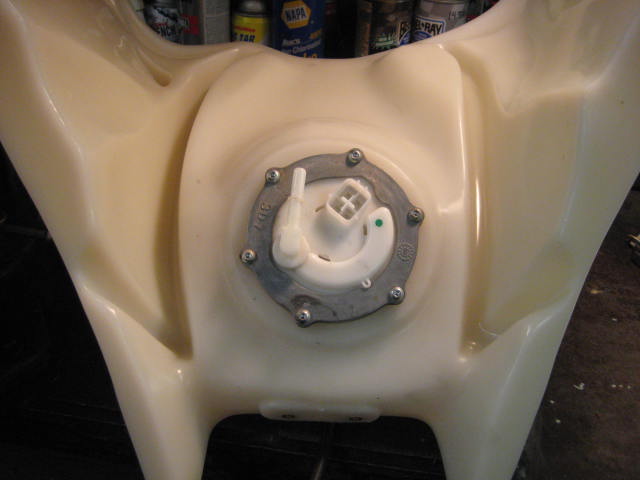
Here is the stock fuel tank mounted to my new fuel tank.
The fuel in the lower lobes of the tank are way to low to be used---so Aqualine
mounted a vacuum fuel pump
in the tank to suck gas from the lower lobes to the fuel pump. Getting large
tanks to work with fuel injection
is a challenge--and I think aqualine found a workable solution. The pump runs
off of vacuum of the engine air intake
and I tapped into a port just downstream of the throttle body. I didn't tee
into this vacuum line as per the instructions
as I had modified (eliminated) some of the stock vacuum tubing.
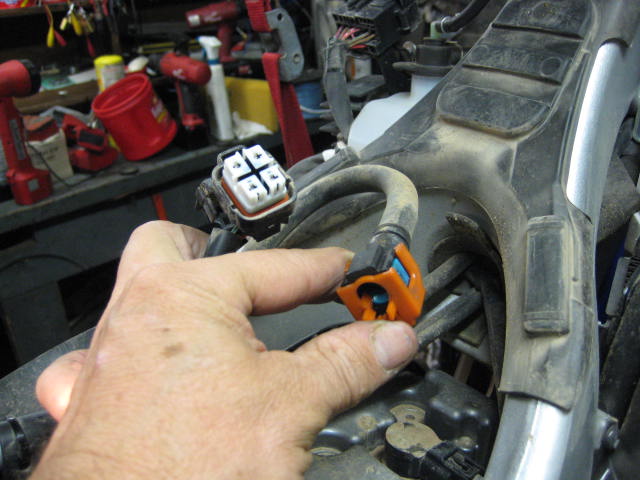
Here is a good view of the fuel connector and the electrical
connector that must be attached to the fuel pump.
This whole install took me about 2 hours--but I took things really slow and
careful so as not to screw things up.
My only problem I ran into was the rubber pad on the frame
rails you see below had to be trimmed down a little
as the tank was to high in the front to bolt it down--a little trimming with
a razor knife and all was well.
Do not remove the rubber--that wouldn't be a good idea having the tank rubbing
on the bare frame.
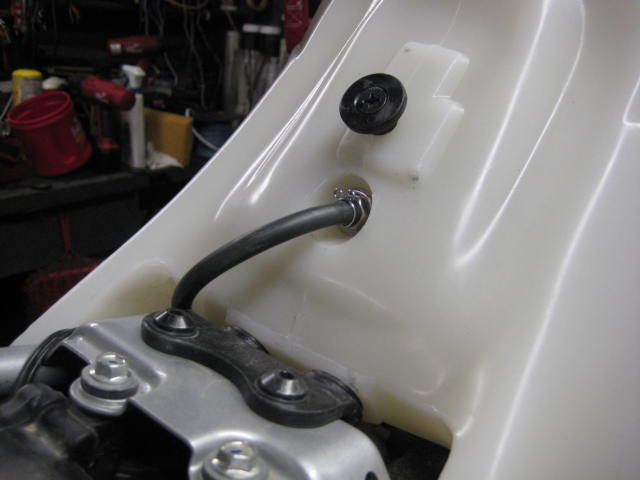
This is the vacuum line that comes out of the tank and
goes to the vacuum pump inside the tank.
The other end hooks to a vacuum port downstream of the throttle body.
I've pondered putting a valve in this line so the pump is not working all
the time---it really only needs
to run when fuel is really low.
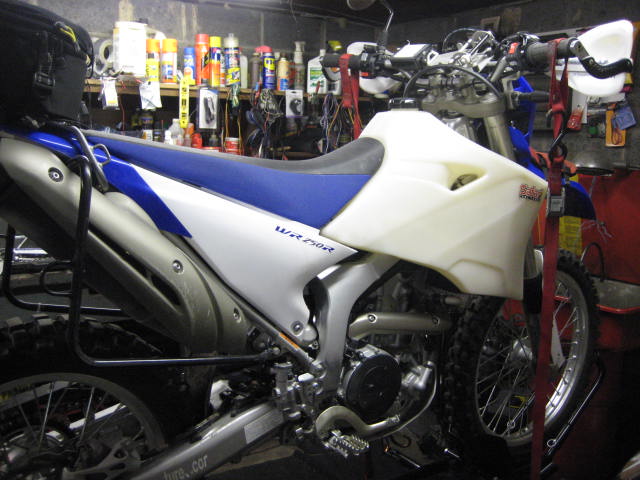
All fit up and done.
Little Dog wants to go--what a pain little dog is---always
wanting to go, go, go !!!!
Where'd he get that from ???
I loaded the bike on my trailer and hauled it to town and
filled the tank to the top.
3.66 gallons is it----I am expecting to get a couple more tenths of a gallon
in there after the tank
swells out a little.

When I first filled the tank I marked each gallon so I
would always know exactly how much fuel I have left.
All worked out well and I'm a happy camper.
So now the bike is completely done to my satisfaction.
I now have an over 200 mile range.
You may have notice I have ignored a whole lot of mods some others have done.
I have no desire for more power or noise.
I have no desire to upgrade the suspension--it's perfect for me.
I don't see me doing anything else to the bike except riding it.
Maybe Colorado or New Mexico-------forgot.
Maintenance and On-going Stuff
I have no problem going 3,500 miles between oil changes if I have to-----but
so far it's been convenient to change it earlier.
I put 5 wt. fork oil in the front forks------BigDog likes !!!!
I've greased the swingarm, shock lnkage and head bearings once---didn't really
need it---but glad to know it's OK.
I've tried different gearing but for a long ride I still prefer stock. It's
been said it won't pull 6th or maybe even 5th
going up a steep hill and you should gear down.
Well----it's much simpler to just tap your gearshift-------duh ????? And you
still got 5th and 6th when you can use it.
Most people gear it down--I can understand that---but most are not using the
bike in the manner I am.
I'd definitely gear down if 1st is not low enough for your riding. I find
1st plenty low for my riding. YMMV---a lot !!!
I got a dirt bike---this is my long distance offroad adventure bike.
I thought the motor had a rod out of it for along time......holy
crap was it getting noisy !!!
The skidplate was the culprit. I just cleaned under and retightened it.
If you didn't know---I sold my DRZ400S and bought a Husky TE610 to replace
it-----then bought this to replace
the Husky--------no regrets at all. I can ride this bike faster and easier
in most instances.
Not that I'm in a hurry-----------just sayin'...................as they say
!!!!
It'll will go slow too-----if you so chose.
I've ran my heated grips in conjuction with my heated vest, heated arms chaps
and heated gloves (widder brand) with no problems.
It holds the battery voltage better than my KLR---my old TE610 did this very
well to I must say---it had
a very good charging system.
Head, swingarm and shock linkage bearings.
I completely dis-assembled my swingarm and shock lingage
bearings at about 6,000 miles ??
they were really OK---I added some grease---nice to know everything is OK
there.
At 8,500 miles I checked my head bearings---good thing---the upper bearing
was almost dry of grease.
Failure of this bearing was close. I greased it with Bel-Ray waterproof grease
and all is well.
I have found that this is typical of all bikes.
I do not want to have to deal with a failure of any of these bearings on a
long ride of several thousand miles.
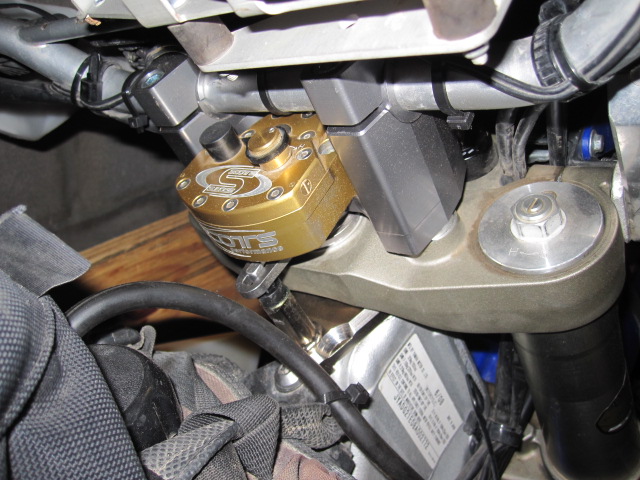
In May 2010 I added a Scotts Steering Damper---I already
had the damper which was on my KLR,
so I just needed to get the mounting kit.
I kept my stock original bars as they had my $130 heated grips epoxied to
them.
I also need the crossbar on my stock bars---most aftermarket bars don't have
one.
The kit came with the pin mount that goes under the top triple tree, the risers
(with shims for my
skinny stock bars) and another pivot arm--it needed one with a different length.
To changed pivot arms---be sure you order the tool to do that if you have
to do that.
But if you order the whole thing and don't have the damper it will come with
the correct one.
I wish I could remember who sold me this rack----he didn't
make but a handful and I got the last one.
He was from Missouri and sold it to me really cheap.
Really nice---I'm prepping right now for what I hope to be a 5-7,000 mile
ride ????
It will come in handy.
We ate chinese the other night---and look what I found
!!!!!
OK---is you say so.
 J
J
June 17th, 2010
I'm was in Colorado when I got these racks sent to my son's
house-----so I didn't get my usual
UPS girl-----boy was he ugly.
I wasn't going to install the wolfan expedtion saddlebags------but.........
I already had the bags on my 950 so I just had to buy the racks.
While I was scratchin my butt trying to figure out how to put the ride side
rack on
my son Marty had this bolted up before I knew it--man he's catchin' on to
this adventure stuff.
The right one was a little harder as you have to attach a bracket to the subframe--a very good design.
Here is that bracket----the one bolt on the right might
be a pain for you unless you take off your fender......
but..........this very bolt was also used on my dirt bagz and I had welded
the nut on top so it was easy for me,
and I didn't have to remove my fender.
Does this make my ass look fat ???? Well...........a little.
I blue loctited all bolts----I wasn't going to, but when I took my dirt bagz
racks off the bolts were
loose-----except for the one that was gone !!!!!
This is recommended by Mr. Wolfman himself-----for good reason.
Sorry about the KTM hat.

Anyway---the botom line is they are 100% waterproof--which
is nice.
If you order the bags and rack you get a special deal of $399
Here's the link to the bags Wolfman
Update 9-1-10
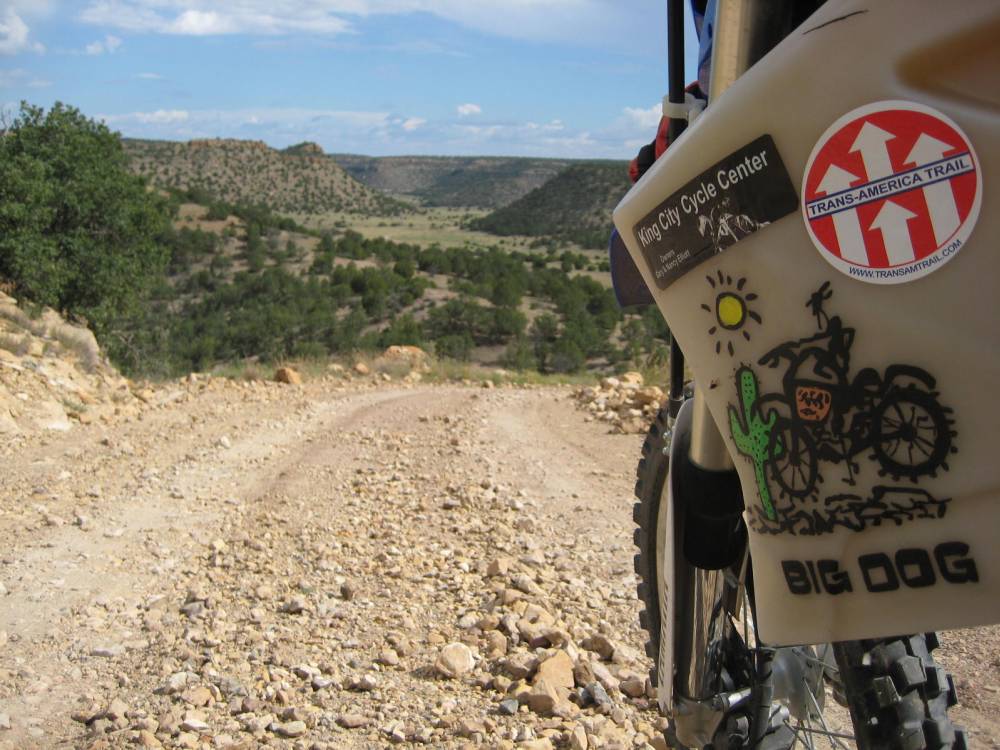
Well My WR took me from Mexico to Canada and back on a
27 day 5,300 mile offroad trek
this July and August, 2010.
I couldn't be more estatic about the bike----it did everything I ask of it
and that was a lot.
My Pirelli MT21 on the front lasted the whole trip---but I used 1 1/2 Dunlop
606's on the rear.
The bike now has 15,900 miles on it and my buddy Scott
who went with me on this ride has
much more. Both our bikes on the same day when it was way over 100° experienced
the same thing.
For a brief moment both bikes acted like you were running out of gas--however
they came out of it and both
got us back home after running hundreds more miles.
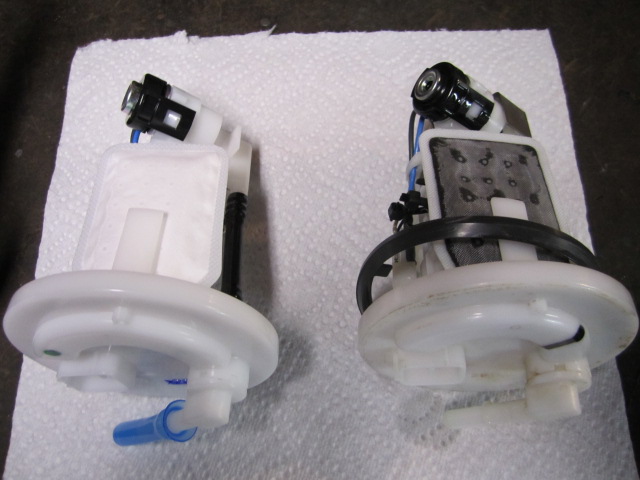
So we both got our fuel pumps replaced--this was under
warranty and no cost to us.
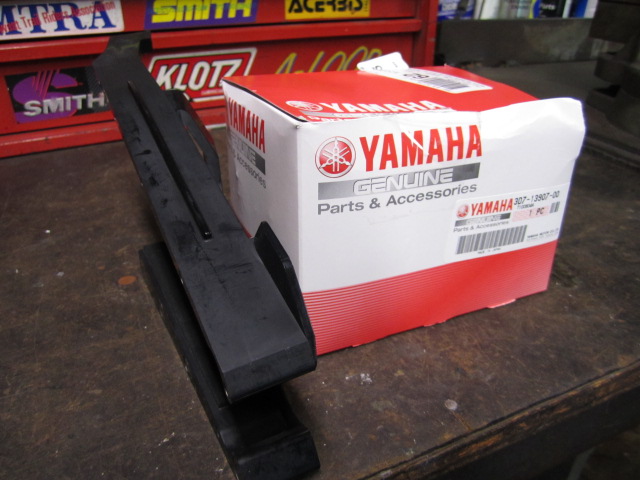
I replaced my swingarm protector again also--this is my 2nd replacement I
think.
Fuel pumps---Old on the right--and new on the left.
Go to your dealer---be nice--explain it's not an internet
scare and most all these
pumps are failing and the problem probably can't be re-created in the shop.
They know there is a problem and if the dealer talks to the people in the
know
at Yamaha---it'll get replaced under warranty.
At this time I also replaced my original spark plug which is shown below.
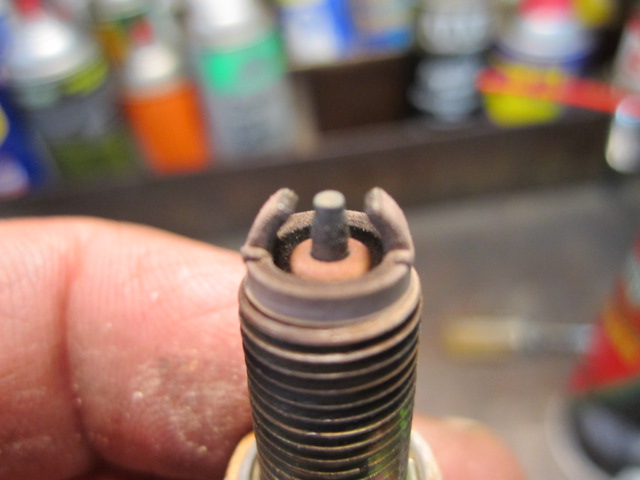
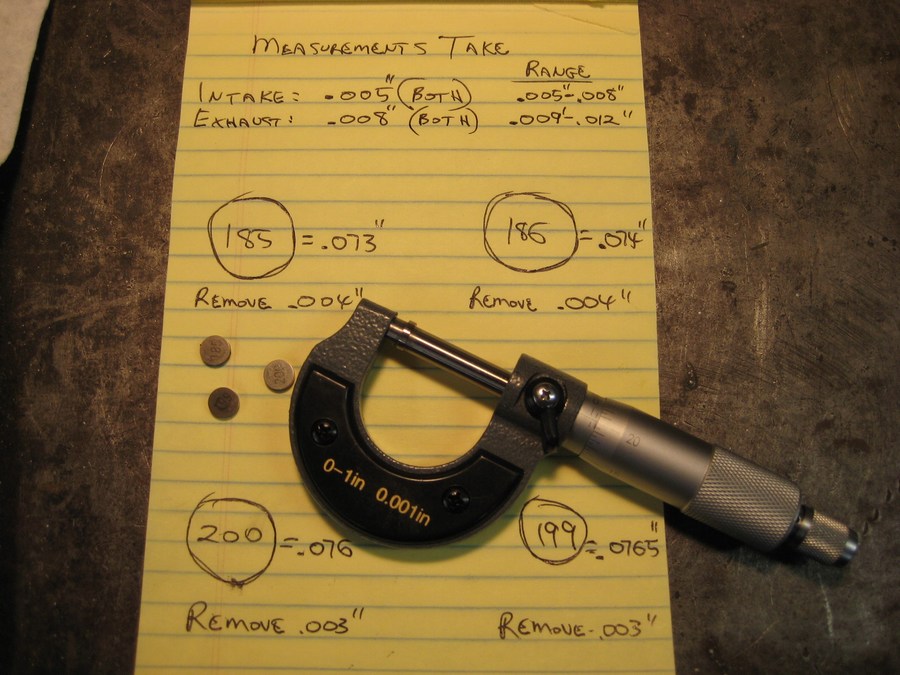
Valve Check at 18,200 miles
Yamaha says don't check my valves till 26,000 miles--but
I was afraid that mileage may come in the
middle of this years riding---and I was curious.
I am a pretty good mechanic-----and have never had a bike in the shop---but
this is a pretty daunting task.
Even with some internet help it is very involved---you have to remove so much
stuff---the throttle body
being by far the most difficult thing you'll have to do---actually putting
it back on was harder.
You'll need a lot of mechical skills and tools---and besides feelers gauges,
a torque wrench and
a micrometer----a lot of other weird wrenches to take bolts out in very tight
places.
Here is what I found----at the top you'll see what clearances
I found. The intakes were at .005" and
the exhausts were both at .008". You can also see the range that they
are suppose to be set at. The numbers
on circles are the numbers on top of the little shim--you can see the shims
just left of my micrometer---and one
is in the micrometer. I measured each shim to the thousandth of a inch and
did some calculating to see
what shim I would need to correct my clearances. Except here is where BigDog
does this different than anybody
I know of.
After calculations I needed a shim .004 thinner for the
exhausts--and .003" thinner for the intakes to make
my clearances at the widest gap allowable. Why the widest you ask????---so
I don't have to do this for a long
time again---valve clearances always close up (tighter). Thing is---shims
don't come in exact sizes to get things
just where I want them, so I tediously sand them down with a diamond stone
knife sharpening stone to the
thickness I need. The advantages of this are several-----I didn't have to
order or pay for new ones, I could get
the clearances exactly the way I wanted them and get my bike back together.
I've did this on all my bikes since they invented overhead
camshafts----no problems ever. I've been scourned and
critized severely for doing this---people saying I destroyed the hardening
of the shim-----bullhocky I say.
I've done this with my KLR with 50,000 miles on it and my 950 KTM with 40,000
miles and no problems.
Sometimes you have to use common sense--not much of that going around these
days.
I bought that nice little micrometer from Sears for $19.
If you think you may want to adjust you valves----and think
maybe it's time to replace the spark plug---throttle cables or clutch cable,
now is the time since you have to remove this stuff to do the work---you also
have to drain the cooling system believe it or not
as coolant goes thru some kind of contraption on the throttle body.
Alaska
I've been very busy getting the WR ready for an Alaskan
trip starting this June----2011.
My bike is set up pretty much the same as the trip I did from Mexico to Canada.
A lot of maintenance has been ongoing---but I needed to do a few things.
I guess I've become somewhat of a Wolfman poster child
as you can see.
I added a small Expedition tail bag and tank panniers from Wolfman for this
ride.
I've been using this wolfman Enduro tank bag since I've
had this bike---it will go
along with the tank panniers.
These are new from Wolfman and is the small size---the mediup and large are way to large for my needs.

I put on a Mefo Explorer rear tire-----the tire will shine
almost all the time in
the Northern terrain and will last 7-9,000 miles (they said). The Mefo's sucked
for my Alaska ride--never again.
But----I refused to run the recommended 41 PSI as it is brutal offroad. So
the tire may be fine for you.
The smaller diameter also geared my bike to low for my liking. At 4,000 miles
they were toast.
It's back to my trusty Dunlop 606's.
New chain and sprockets hide behind the VW Sandman sprocket
cover.
I've played with lots of gearing on this bike contrary to one person on the
WR forum who says I don't
have no idea how to gear a bike-----but am running 14---50 on this ride. I
was gearing moto-cross, hillclimbers, enduro
and hare scramble bikes when he was sucking on his momma's tit.
The 14 just barely fits in there---but it's fine. I've decided I'll never
put a smaller sprocket on my bike than a 14 tooth.
I'll use the rear sprocket for gearing changes---and this will also help keep
the chain off my swingarm
and grind a hole in it.
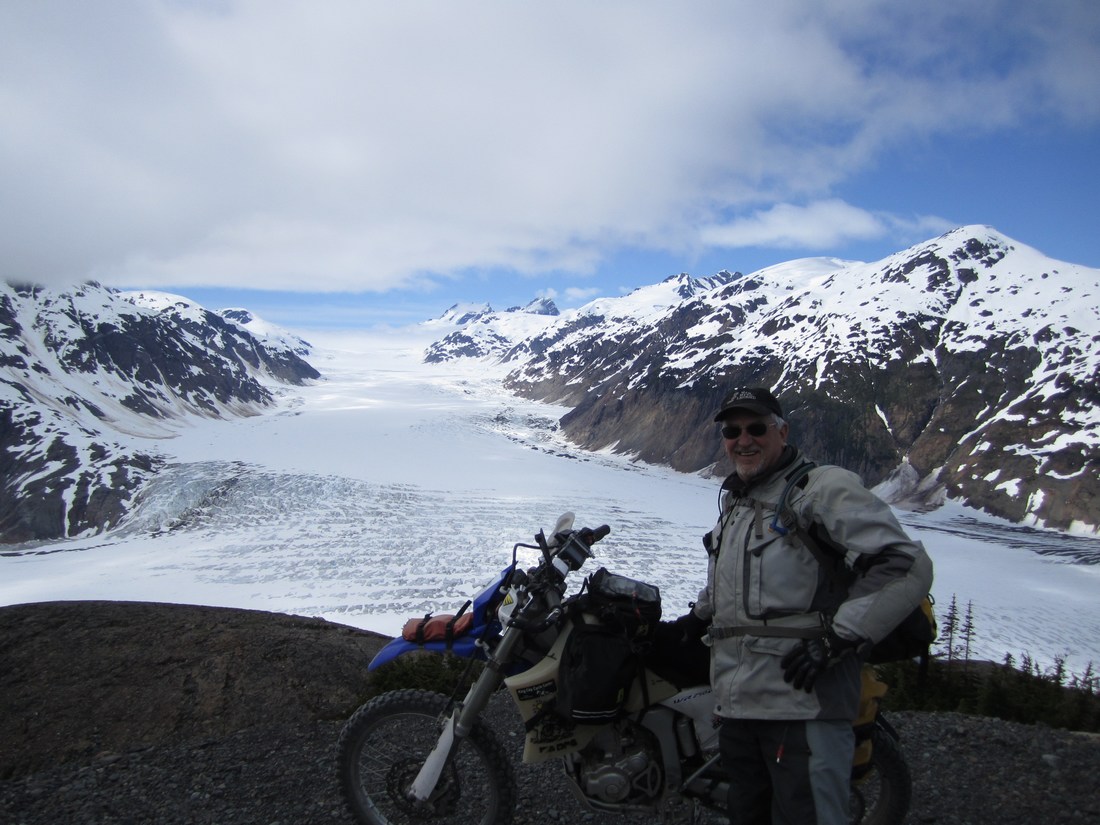
We may end up here.
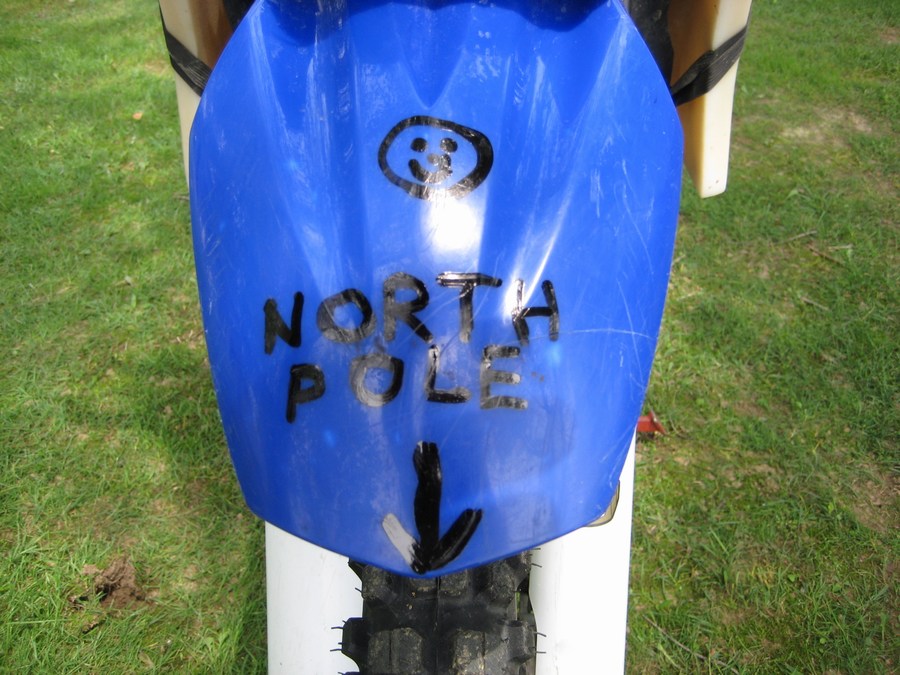
My WR250R took me 7,000 miles and all the way to Deadhourse
Alaska with absolutely no problems whatsoever.
It ran flawless and took me to the most beautiful place I've ever been.
The Salmon Glacier--20 miles down a dead end dirt road North of Hyder, Alaska.
The stator failure of my buddy Dingweed's WR250R on this
trip.
Here is the scoop.
First off-----there has not been one reported normal failure of a stator on
a WR250R---not one--so yours is not going to fail.
This one didn't count----before we left Scott bought a brand new battery which
he put in his bike----it started his bike and
immediately went in to a dead short and the voltage regulator and stator went
into overtime trying to do a job that couldn't be done.
It was a terrible strain on the charging system trying to charge a shorted
battery. He sent it back and they sent him another---same thing.
Scott had no idea after starting the bike what was going on and ran it for
quite awhile which we think damgaged the stator.
Not long afterward after he put his old battery back in we were in Alaska
and it quit charging---we took it apart and the stator was fried.
Luckily he found a used bike and was able to buy another stator and regulator
and off we went with no further problems.
I'm not saying what brand of battery it was----I don't believe in badgering
a company publicly when they have a little problem.
So if you put a shorted battery in your WR--the stator
and maybe the regulator will burn up.
11-5-11
28,950 Miles
Just finished riding the TransArkansasTrail--------TART.
No problems to report---still runs like a top.
Just put on another new rear tire.
5-31-12
32,500 Miles
Just finished riding about 2,500 miles down in Ky., Tenn., Miss., N.C., W.V.
and Indiana.
Ran with Sam Corerro (creator of the Trans America Trail) and others on the
new Tennessee
TAT and the TET (Trans Eastern Trail).
Bike is still running flawlessly.
I've been wanting to check my cam chain thinking it might need replaced---not
so.
My cam chain tensioner is no where near completely extended--which tells me
the chain is fine.
Took the cam cover off---chain was not loose.
Checked the valves again---waste of time---don't need to look at them again
till 58,000 miles.
7-9-12
I'd read on Advrider where somebody bought some waste backets
from Wal-Mart and modified them to put in the Wolfman
expedition saddlebags to keep them from collapsing when loading and maintain
a full shape.
Not being a fan of hardbags------I kind of put this idea aside until I saw
me buddies. His bags looked fully loaded and I
made a comment to him about how he was all packed and ready to go somewhere---and
he told me they were empty----HHhhmmmm.
You need to buy this exact model or it probably won't fit.
.JPG)
To do this you need to cut the above model waste basket
down to 11 1/2" tall.
Then cut a slot down the side stopping a little before the bottom. The wast
backet is bigger at the top and this allows the basket
to overlap and fit in the Wolfman bags. Genius------somebody else figured
all this out---I can't take credit for this.
Drill a hole at the bottom of the cut so the cut you made won't continue to
split.
.JPG)
You see here how it overlaps.
.JPG)
I cut the basket using 2 different methods---first time
with my air powered cut-off wheel.
This worked but was a total pain as it melted the plastic and I spent an hour
trying to trim off the melted plastic to make a smoothe edge.
So the next one I used my sawzall with a fine tooth blade---easy peezy and
took me one minute with just a little cleanup of the edges with a razor knife.
.JPG)
Drill a hole in the bottom of the waist basket or you'll
never get the basket in or out of the saddlebag---this lets the air escape.
Here it is in the bag and you can see how the basket overlaps. I can't see
this taking any of the bags capacity away as it's a very tight fit.
I had thrown the original bag thingy insert away long ago---as it just was
a pain.
.JPG)
Sorry about the crappy 950 pic-------I use these bags on
my WR and 950.
Here's what they look like--------empty.
.JPG)
The jury is out if I'll like this---I'll let you know.
The waste backets were about $9 apiece.
People that have done this mod have been accused of owning a KLR-----yeh....you
got me there.
.JPG)
Used the above bags with wast basket inserts on a long
ride out in Colorado, Utah and New Mexico
on my WR250R in July and August of 2012-----love the inserts and think I'll
keep them in there.
Update August 2012
While in Colorado with 33,100 miles on the clock----my
2nd fuel pump went South.
Like the first one that went bad---it gave me some warning and I was lucky
to get back to a town and
get a new one 1-Day shipped to the town I was in. I installed it in a motel
room and continued my ride.
My bike now has 34,100 miles on it------8-7-12.
Update 10-2-12
Rode 3,000 miles with the Mobius crew in Wyoming, Idaho,
Montana and Colorado.
No problems------runs like new ---------37,100 miles now
Update 1-29-13
38,500 Miles now
Just finished a ride down in Baja Mexico-----zero problemo's
!!!!
Would have been a much longer ride---but my buddy got injured.
Update 3-4-13
38,500
Rear Suspension Major Maintenance
I think the last time I dis-assembled the rear suspension
and greased everything was at about 9,000 miles.
It was definitely over do to do this again---sure miss the old grease fittings
we used to have on bikes back years ago.
So I put my bike on my motorycle lift and went to work
and removed the swingarm and all linkage parts for what
I hoped would just be a re-greasing and I could put it all right back together.
.jpg)
Besides the swingarm needle bearings there are several
other needle bearings that need greasing.
You should really do this about every 15---20,000 miles. I waited too long
and one bearing---the one that the lower part
of the shock is bolted to was rusted and worn out. In this picture I have
already taken the seals, needle bearing and
sleeve out of the linkage bracket.
.jpg)
In my thumb is the bad parts that went in the lingage arm.
All my other bearings were almost as good as new---so I cleaned them, lubed
them with Belray waterproof grease
and re-assembled them. So I had to order these new parts before I could completely
finish this project.
I shouldn't have to do this again for at least another 15,000 miles.
.jpg)
I had regreased my original steering head bearings for the 2nd time at 37,100 miles and they were still as good as new.
3-10-13
38,500 miles
I regreased all the rear suspension parts and bearings---the
lower shock needle bearing, seals and sleeve needed replacing.
Replaced all 4 wheel bearing seals and outer spacers---these were are original.
Replaced original fork seals which weren't leaking---and changed fork oil
again----Bel-Ray 5wt.
4-27-13
Rode 1,400 miles in Baja---then 2,500 in the Southwest on the Mobius 11 ride.
Bike performed flawlessly and I never touched it.
I have switched to Rotella T6 full synthetic motor oil.
7-27-13
Installed Mondo Moto LED running lights for daytime visibility and nightime
running.
Here they are installed ---------also while doing this I replaced my DRC LED
turn signals from some Tucker Rocky ones
from Rocky Mountain ATV.
Yes my headlight has been cracked for 2 years-------souvenir of the Haul Road
in Alaska---I'm keepin' it.
.jpg)
I made this aluminum bracket------I copied this from my buddy Bill Asher (Bash3r) who did a steller job installing these on his bike.
.jpg)
I wanted the switch super handy.
I have a seperate switch for my headlight also---and can run one---or both---or
none at all.
I made that little bracket also.
.jpg)
Low beam and the Mondo Moto LED's.
.jpg)
Same thing a little farther back-----awesome---I think the lights draw 10 watts each.
.jpg)
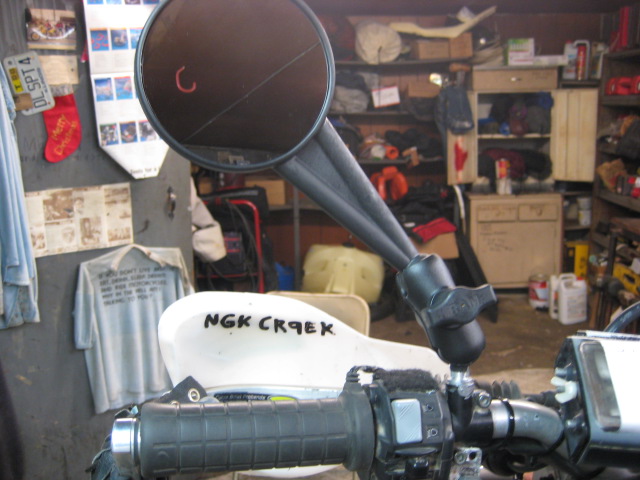
Should have put these on long ago-----Double Take Mirrors.
They will swing out of the way in the event they get smacked and are infinitely
adjustable.
They also come off or on in about 3.2 seconds.
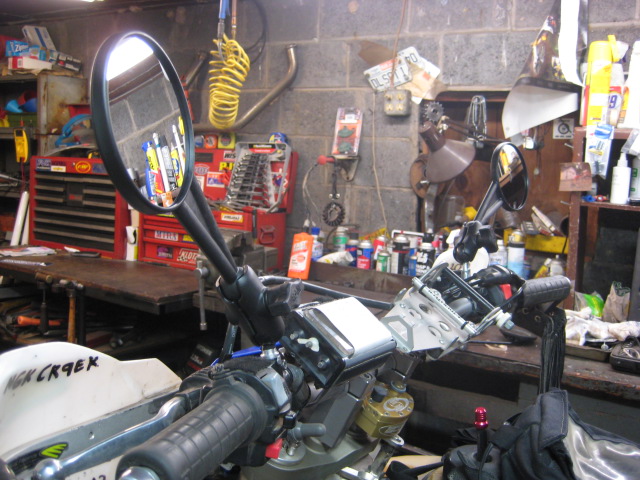
I have them on my KTM450EXC also------very stable and you
can actually see out of them.
There are three pieces in this picture------the mirror----the 2" adjustable
ram arm and the ram base...which is a threaded piece
that screws in where our old mirror did. They make a 4" ram arm if you
feel you need it.
Google "Double Take Mirrors" and you'll find out all you need to
know.
All pieces have to be purchased seperately---the mirror
itself was $25 I think.
On the right side of Yamaha's-----remember that is a left
handed thread----so you need to order
The "Yamaha Adaptor" for the right side.
9-24-13
45,000 Miles on my WR now------------My buddy Dingweeds
has over 50,000 on his.
We just finished about 3,000 miles out West riding the Colorado and Utah Back
Country Discovery Routes.
We never touched our bikes.
Yeh--------during those nasty floods you've read about.
9-30-13
45,000 miles
Installed a manual cam chain tensioner as I was hearing what seemed to be
a loose cam chain.
My inspection proved that the stock cam chain was OK----so I replaced the
automatic tensioner with a manual one, and this
quieted the motor----it was especially noisy at startup. I've never trusted
automatic or hydraulic cam chain adjusters.
Manual ones cannot fail.
It was about $39 and I bought it
HERE
8-22-15
49,700 Miles
Dealer replaced my stator with a new improved one--this was done for free
as it was a re-call issue.
He put new yamaha oil in while doing this---as he had to drain the oil.
More later !!!!!